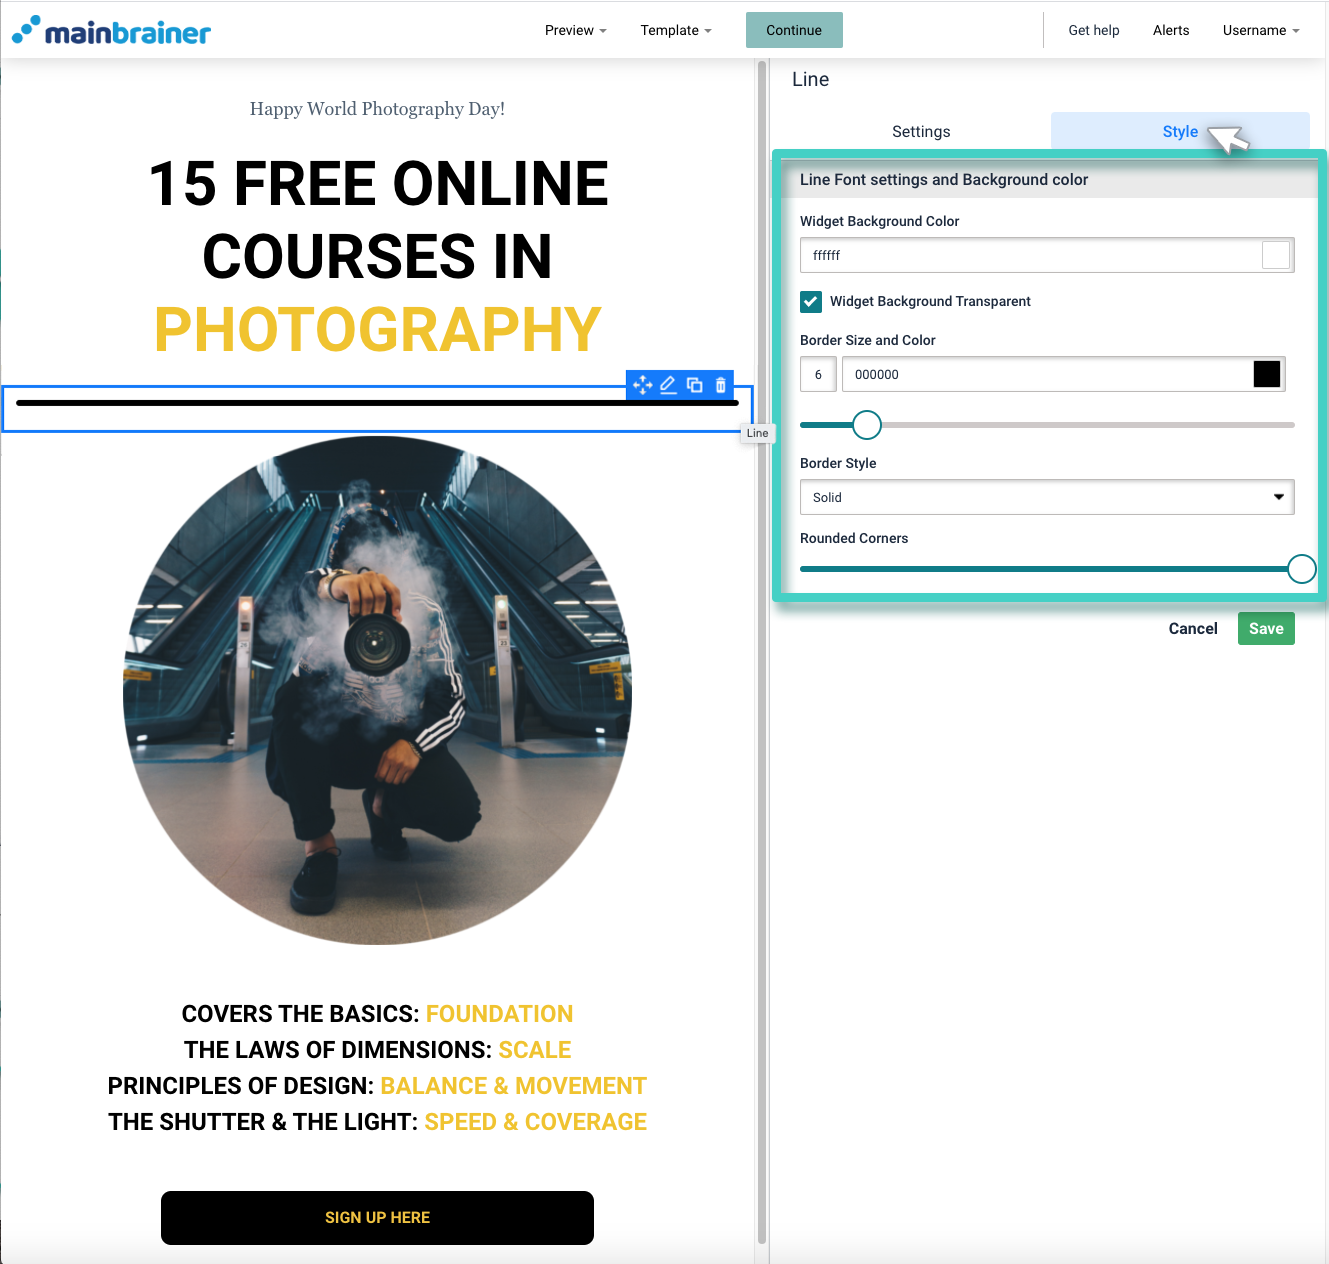
The Line widget helps you add a horizontal line between two content areas in an Email. It helps you visually separate the content areas and create clearly defined sections to improve the Email’s readability.
How to use a Line Widget in an Email Campaign?
Step 1
Navigate to the Email Creator
Use the Main Menu on the left to create an Email and subsequently navigate to the Email Creator.
Step 2
Add a Line widget to your Email
The blank area on the left is the Work area where you design your Email, and the area on the right is the Tools area where all the design elements are displayed as Widgets.
To add a horizontal line to your Email, drag and drop the Line widget to the Work area (As highlighted in the screenshot below).

Step 3
Design the horizontal Line as required
As you drop the widget into the Work area, the widget styling options are displayed on the right under the Style tab (As highlighted in the screenshot below).

The different design options available are:
3.1 Widget Background Color
- Specify the color of the Line’s background. Either use the color picker to select the desired color or select the checkbox – Widget Background Transparent if you wish to make the background transparent.
3.2 Border Size and Color
- Specify the width and color of the horizontal Line. Use the color picker to pick the desired color and change the Line width using the sizing bar.
3.3 Border Style
- Change the style of the horizontal Line. You can choose any style from the following presets – Solid, Dashed, Dotted, Double, Groove, Ridge, Inset, Outset.
3.4 Rounded Corners
- Make the ends of the Line rounded.

Click Save, and that’s it!
You have successfully added a divider Line between two content blocks in your Email!
Let’s proceed, and have a look at how to add a Weblink to an Email using the Link Widget.
