The Spacer widget helps you add space between two widgets/ content blocks in your Email. Including space in your Email can be important from both aesthetic and functional points of view. Pages with appropriate spacing look better and are easier to read, especially on smaller screens.

How to use a Spacer Widget in an Email campaign?
Step 1
Navigate to the Email Creator
Use the Main Menu on the left to create an Email and subsequently navigate to the Email Creator.
Step 2
Add a Spacer widget to your Email
The blank area on the left is the Work area where you design your Email, and the area on the right is the Tools area where all the available design elements are displayed as Widgets.
In order to add a blank Space to your Email, drag and drop the Spacer widget to the Work area (as highlighted in the screenshot below).

Step 3
Design the space as required
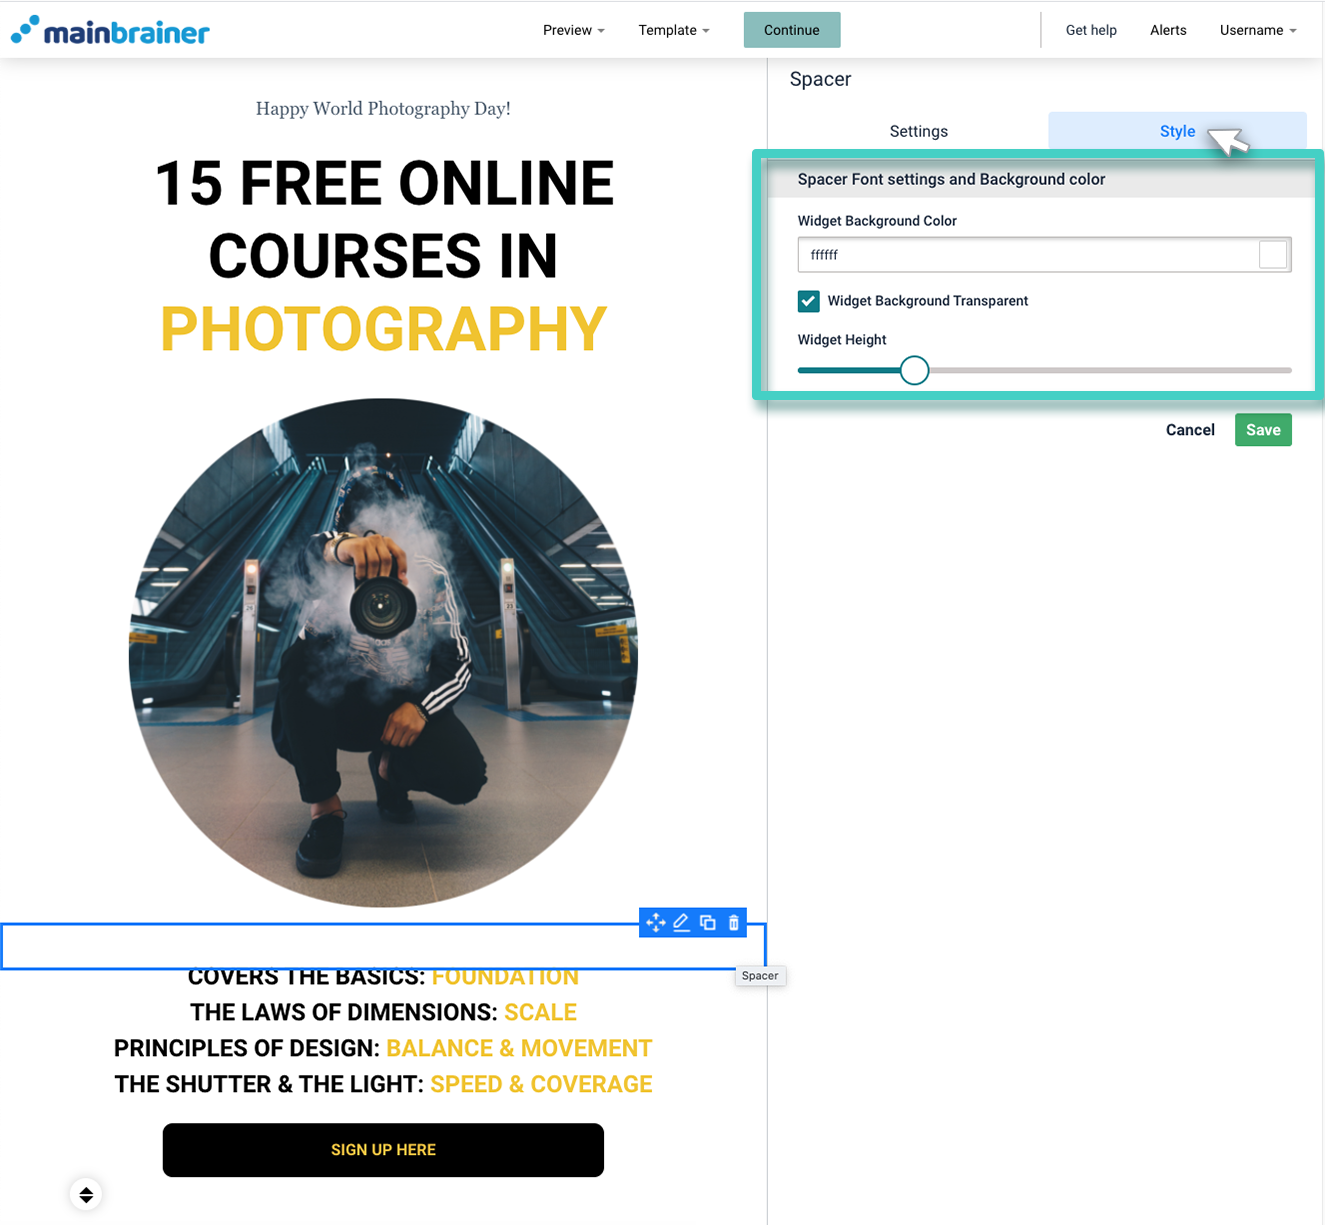
Use the various options available under the Style tab to customize the space as per your design preferences (as highlighted in the screenshot below).

Herein, use the fields:
3.1 Spacer Font settings and Background Color
- Widget Background Color: Either use the color picker to specify the color of the Space or select the checkbox – Widget Background Transparent if you wish to make this Space transparent.
3.2 Widget Height
- Use this sizing bar to adjust the height of the blank space.
Click Save, and that’s it!
You have successfully added blank space between two content blocks on your Email!
Let’s proceed, and have a look at how to add a divider line between two content blocks in the Email using the Line Widget.
