The Social widget helps you add social media profile links to your landing page. Using this widget, you can add links to a Facebook page, Instagram profile, Twitter handle, Youtube channel, and LinkedIn profiles.
How to use a Social Widget in a Landing Page?
Step 1
Navigate to the landing page builder
Use the Main Menu on the left to create a landing page and subsequently navigate to our landing page builder.
Step 2
Add a Social widget to your landing page
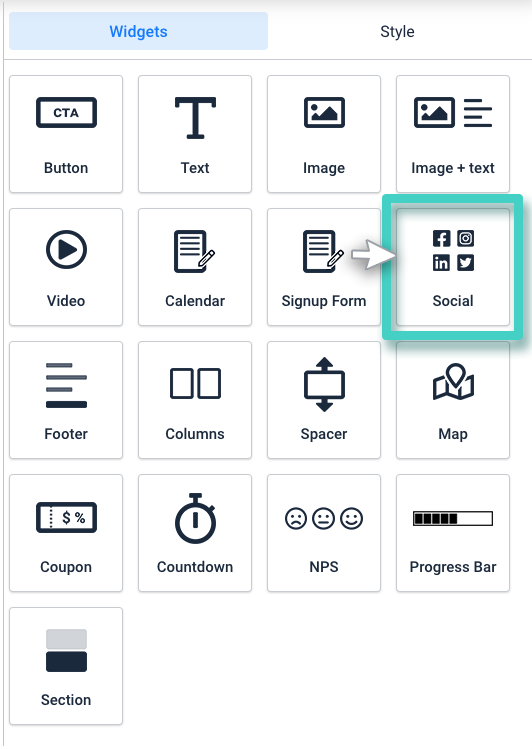
The blank area on the left is the work area where you design your landing page, and the area on the right is the tools area where all the available design elements are displayed as Widgets.
In order to add links to your social media profiles to your landing page, drag and drop the Social widget to the work area (as highlighted in the screenshot below).

Step 3
Select the social media icons that you wish to add to your landing page.
As you drop the widget into the work area, the widget settings are displayed on the right (as highlighted in the screenshot below).
![]()
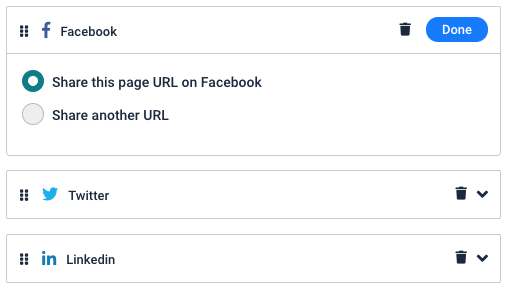
You’ll notice that all social media platforms are displayed as a list.
![]()
As highlighted in the above screenshot, against each listing, there are two options:
- A Delete button – Use it to delete the irrelevant social media icons from your landing page.
- An Expand button – For the icons that you wish to retain, click the expand button to enter the subsequent details.
Let’s have a look at the expanded settings for the social media icons:
3.1 Settings for Facebook, Twitter, and LinkedIn
Similar settings are available for these three media. For example:

Use these settings to specify if:
- you would like to redirect the clicks to your business’s Facebook page URL (the one specified under your account’s Integrations), or
- you would like to redirect the clicks to some other URL.
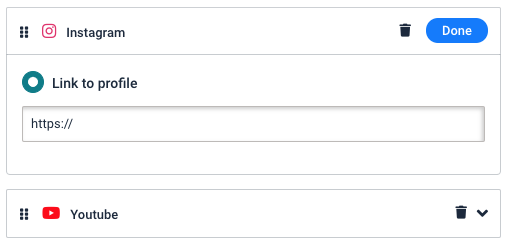
3.2 Settings for Instagram and Youtube

Herein, type in the URL to which you would like to redirect the clicks.
Step 4
Style your Social Media Icons
By default, we display the social media icons with their original branding styles, but you can customize the appearance of icons if you wish to.
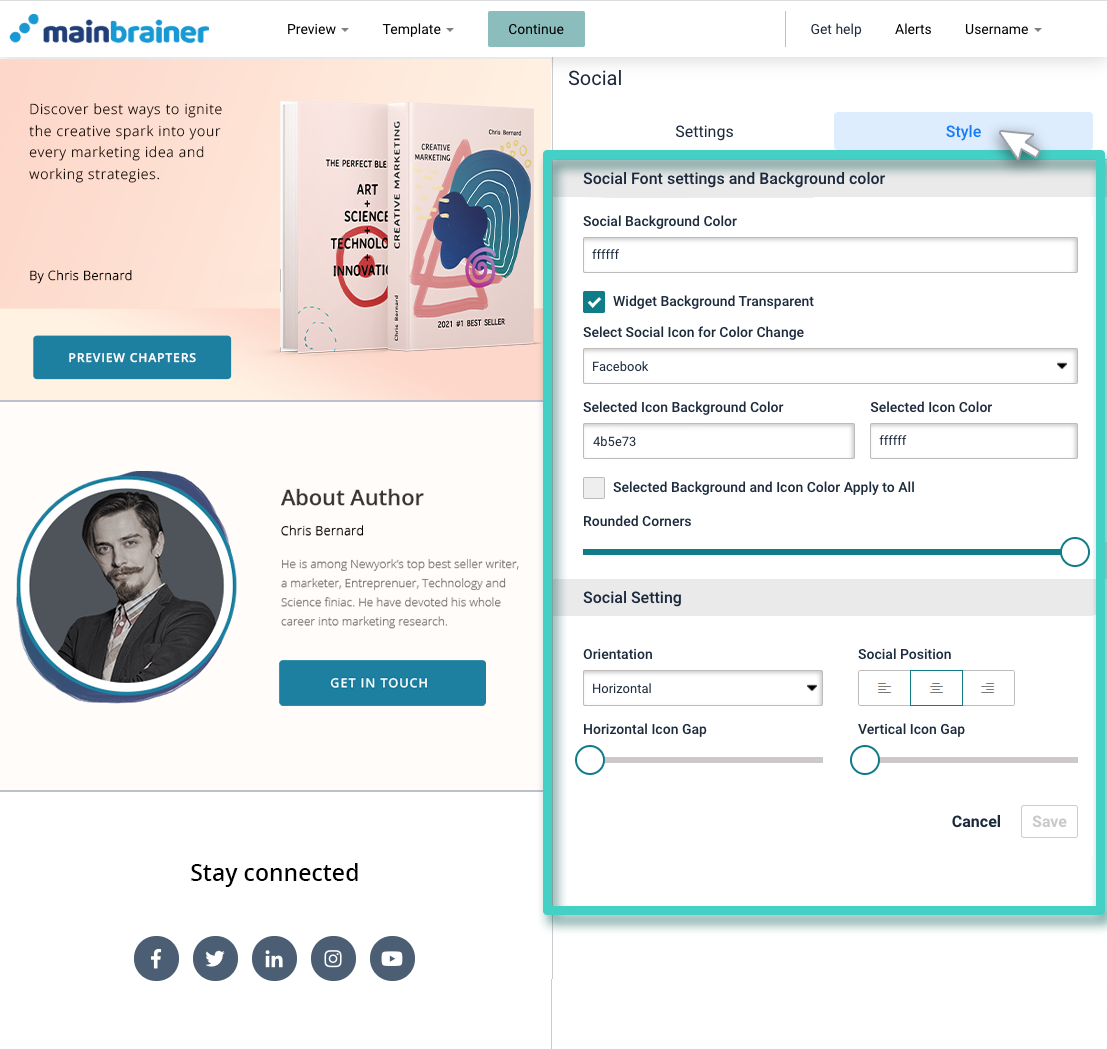
To customize the look and feel of the icons, click the Style tab as highlighted in the screenshot below:

Herein, the different design options available are:
4.1 Social Font settings and Background color
- Social Background Color to change the color of the widget background. You can also choose to make the widget background transparent.
- To customize the icons:
- Select the icon that you want to customize by using the dropdown – Select Social Icon for Color Change

- Subsequently, select the colors you wish to use for the icon background, and the icon itself using the dropdowns Selected Icon Background Color and Selected Icon Color, respectively.
- Select the checkbox Selected Background and Icon Color Apply to All if you wish to apply the selected color scheme to all the social icons.
- Use the Rounded Corners sizing bar to add rounded corners to the icons.
- Select the icon that you want to customize by using the dropdown – Select Social Icon for Color Change
4.2 Social Setting
Customize the icons using the following settings:
- Orientation to select whether you would like to display the icons vertically (one below the other), or horizontally (side by side)
- Social Position to choose the alignment of the icons within the widget boundary.
- Horizontal Icon Gap to select the distance between the icons.
- Vertical Icon Gap to adjust the distance between the icon and widget boundaries.
Click Save and that’s it!
You have successfully added your brand’s social media profile links to your landing page!
Let’s proceed, and have a look at how to add a footer to a landing page using the Footer Widget!
