The Image widget helps you add images to your landing page.
Using this widget, you can:
- Hyperlink the image to an external webpage.
- As an advanced feature, you can also add different images for the web and mobile for the same campaign. By doing so, you can design different viewing experiences for people who open the campaigns on mobile devices vis-à-vis the ones who open the campaign on the web.
How to use an Image widget in a landing page?
Step 1
Navigate to the landing page builder
Use the Main Menu on the left to create a landing page and subsequently navigate to the landing page builder.
Step 2
Add an Image widget to your landing page
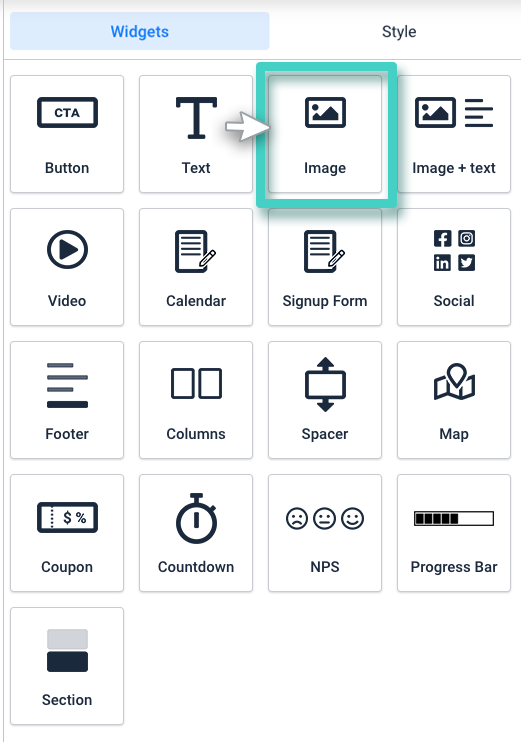
The blank area on the left is the work area where you design your landing page, and the area on the right is the tools area where all the available design elements are displayed as widgets.
In order to add an image to your landing page, drag and drop the Image widget to the work area (as highlighted in the screenshot below).
Step 3
Upload the required image using the Image Settings
As you drop the widget into the work area, the widget Settings are displayed on the right (as highlighted in the screenshot below).
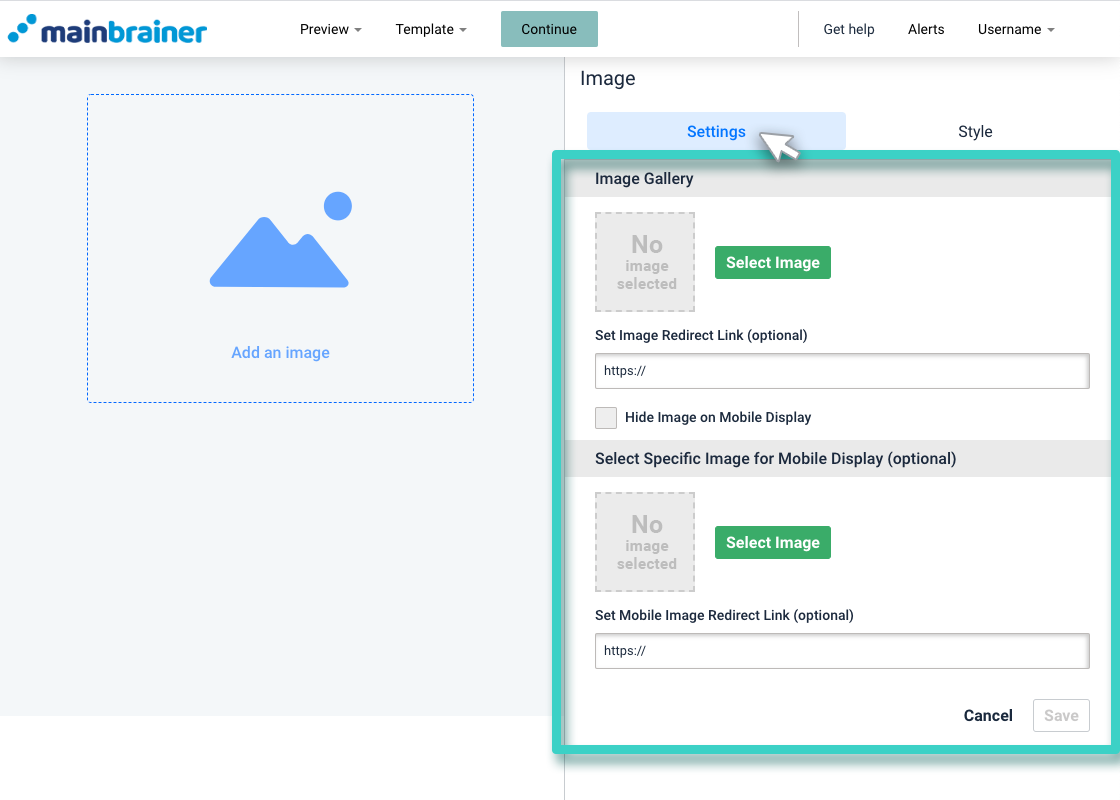
Herein, you have the option of choosing different images for web and mobile views of this campaign.
In the above screenshot:
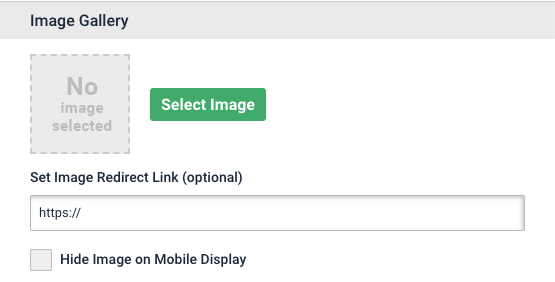
3.1 Image Gallery – Use this area to specify the image that you want to display when the campaign is viewed on a web device.
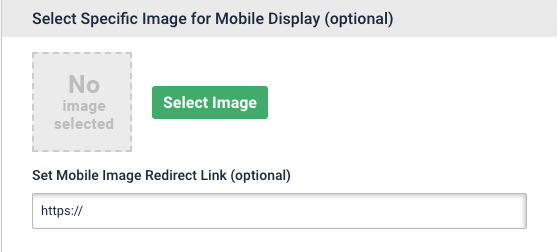
3.2 Select Specific Image for Mobile Display (optional) – Use this area to specify the image that you want to display when the campaign is viewed on a mobile device.
For both these areas:
- Use the Select Image button to upload the required image; and
- Use the Set Image Redirect link field to specify the external URL to which you want to redirect the clicks on this image.
Note: This functionality of choosing different images is optional. In case you wish to display the same image in all viewing devices, only use the settings under the Image Gallery heading.
Step 4
Style your image as per your design preferences
You can edit the appearance of your image using the options available under the Style tab (as highlighted in the screenshot below).
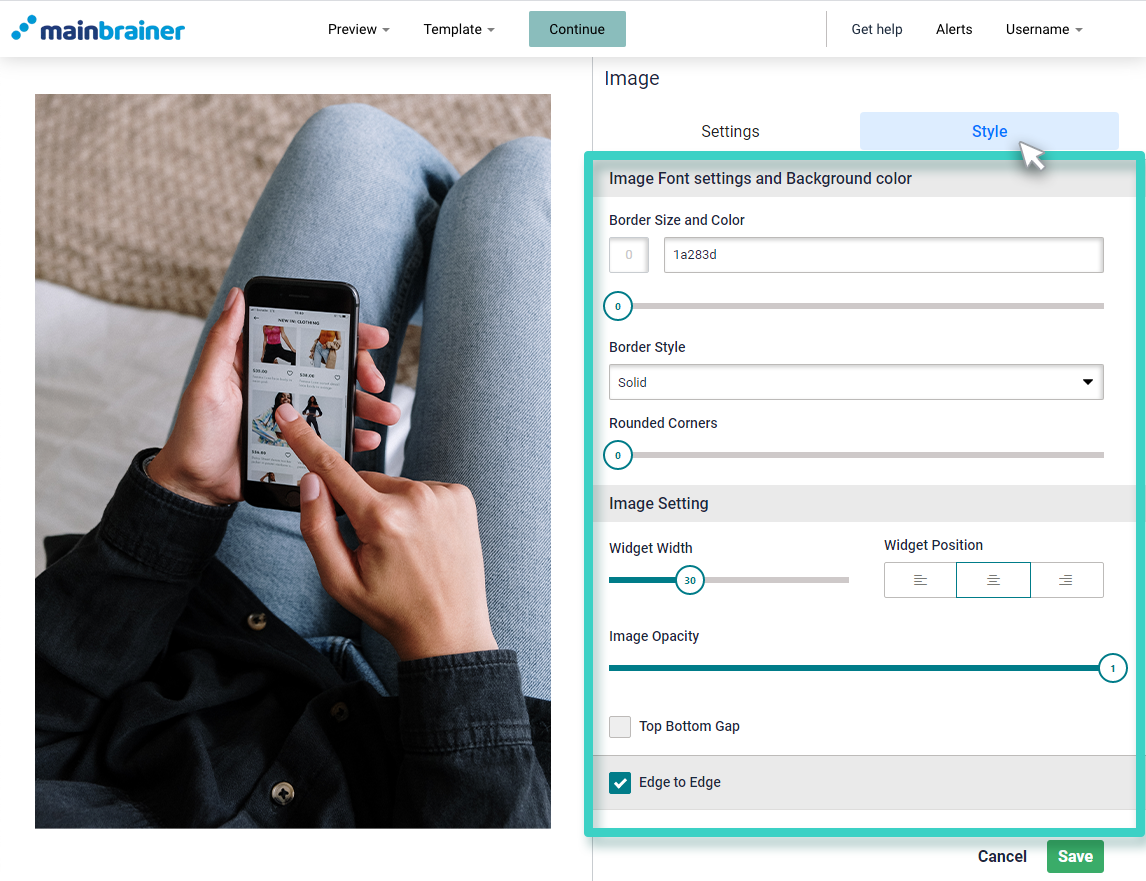
Herein, the different design options available are:
4.1 Image Font settings and Background color
- Border Size and Color to change the color of the image border (use the subsequent sizing bar to adjust the thickness of the border)
- Border Style to change the type of image border – solid, dotted, etc.,
- Rounded Corners – sizing bar to add rounded corners to the image.
4.2 Image Setting
- Widget Width to adjust the width of the button
- Widget Position to change the alignment of the image in the design
- Image Opacity to adjust the degree of opacity of the image in the design.
- Top Bottom Gap to let you add a gap above the image
4.3 Edge to Edge checkbox
Select the Edge-to-Edge checkbox to fit the image to the width of the work area.
Click Save and that’s it!
You have successfully added an image to your landing page!
Let’s proceed, and have a look at how to add a combination of an image and a text to a landing page using the Image + Text Widget!
