When you add a signup Form to your landing page or survey, you get complete control over the customer signup data.
Let’s have a look at the various Settings available for the signup widget and how you can use them to define the customer signup rules, i.e., the rules based on which you would like the customers who signup via this form to be added to the CRM.
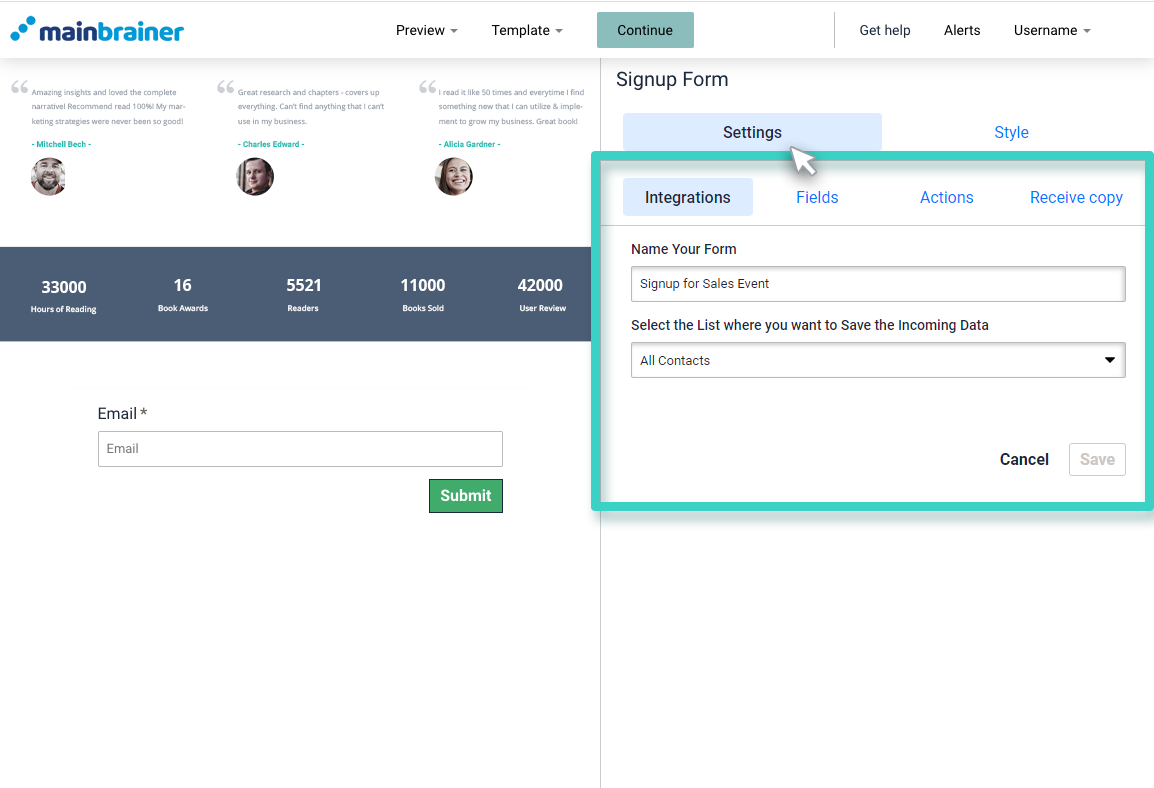
As you can see in the screenshot above, there are four sub-tabs under the Settings tab. Let’s take them up one by one and see how to use them as per our requirements.
1. Integration
The options available under the Integration sub-tab help you specify the CRM contacts list to which you would like to add the customers who signup via this form.
It has the following two fields:
- Name Your Form

Use this field to add a relevant name for your signup form (for your reference purpose only). - Select the List where you want to Save the Incoming Data

Use this field to specify the CRM list to which you would like to add the customers who signup via this form.
2. Fields
The Fields sub-tab displays all the available fields from the list specified in the previous Integration sub-tab.
You can choose to add as many fields to your form as you wish. Here’s how:
Expand the Add a Field section by clicking the + button:
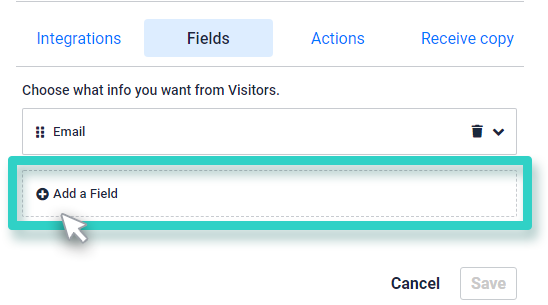
As you do, it displays all the available fields from the list specified in the Integration sub-tab in Step I above. Click the fields you wish to add to your form, and those will appear in the work area. You can choose to add as many fields to your form as you wish.
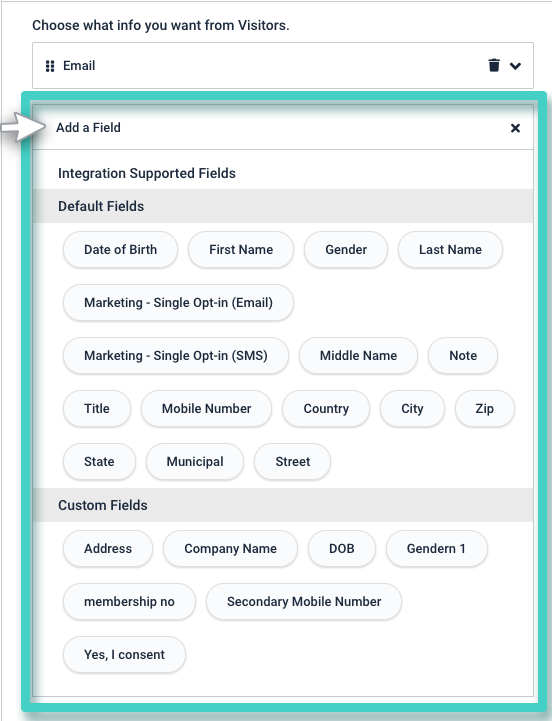
As you click a field, you can:
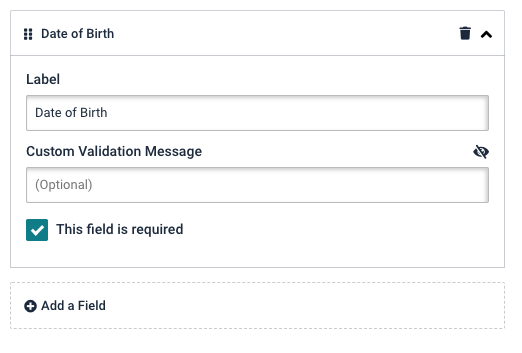
- Change its Label text and placeholder text, and
- Add a Custom Validation Message in case of mandatory fields. This validation message appears when a user tries to submit the form without entering data in the mandatory field. Click Done/strong> to save your changes.
Note: For the fields – Email and Mobile Number, you need to specify if your target audience is already opted in. In case they aren’t, you need to specify the manner in which you want the audience to be opted in – whether by single opt-in process or double opt-in process.
For example, let’s look at the additional settings available for the Email field:
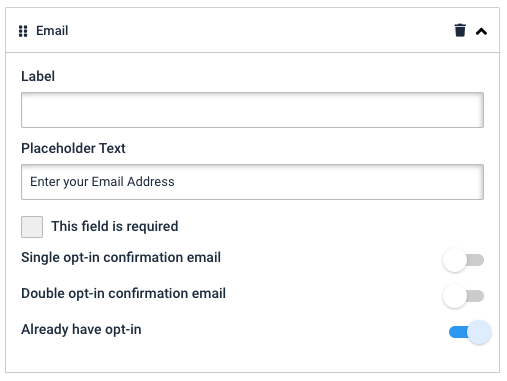
Here, you can use the toggle buttons to specify if you want the customers to signup via a single opt-in or a double opt-in.
- If you choose to add customers via a single opt-in, use the subsequent field to select the Email trigger template that you would like to send to your customers when they signup their Email address.
- If you choose to add customers via a double opt-in, use the subsequent field to select the double opt-in Email template to seek their explicit confirmation for Email signup.
- In case your target audience has already opted-in to receive communication from you, keep the Already have opt-in slider active.
Similar settings will be displayed, in case you choose to add theMobile Number field to your signup form:
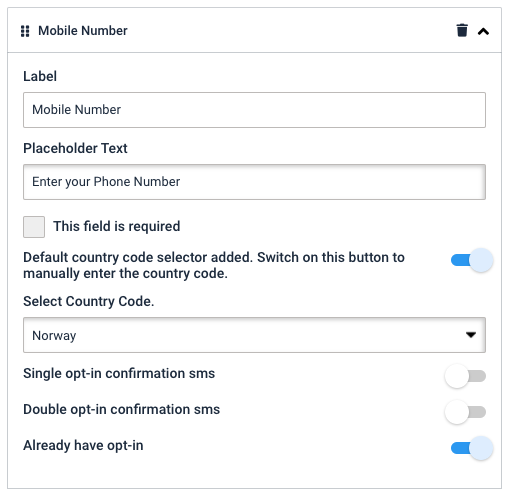
3. Actions
The settings under this sub-tab help you configure a click action for the Submit button.
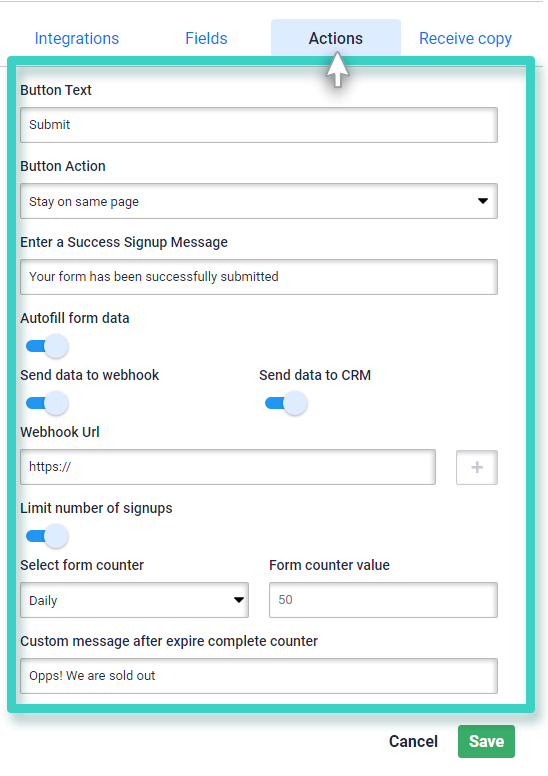
Herein, use the fields:
3.1 Button Text to add/edit the text that appears on the clickable button at the bottom of the signup widget.
3.2 Button Action to specify the action that you want to trigger on the click of this button. You can choose to:
- Display a success message and stay on the same landing page/ survey, or
- Redirect the button click to a landing page, or
- Redirect the button click to a survey, or
- Redirect the button click to an external URL, or
- Open a pop-up window
Based on the option you select in this field, the subsequent field gathers the required information relevant to that action.
3.3 Autofill Form data to auto fill customer data on their behalf for the contacts that were stored in the CRM. If your audience wants, they can edit the auto filled data which will eventually be updated in the CRM once they submit the form.
3.4 Send data to webhook allows you to enter a Webhook URL to send your signup data on it. You can enter at least three URLs and you can also select if you want to send data to the CRM.
3.5 Limit Number of Signups allows you to control the number of people who sign up through your form. Once selected, you can edit further options available.
4. Receive Copy (Still in testing mode, confirm with Devs)
This sub-tab allows the user to send the signup widget data to five different email ids. It means you can receive and study the landing page or survey data directly through your email.
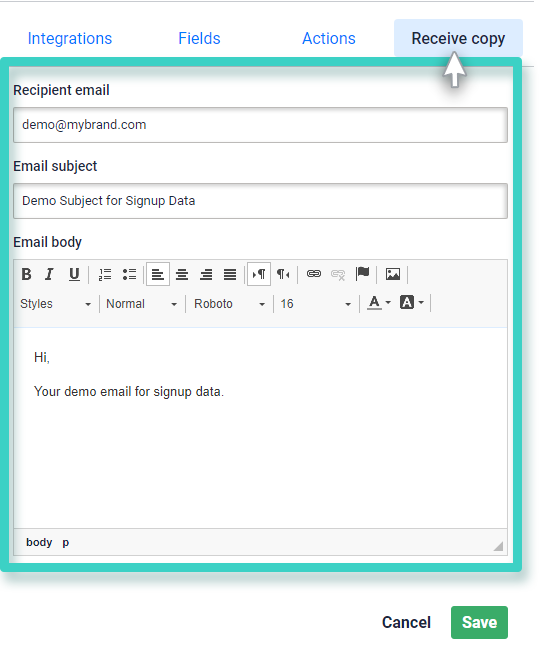
All you have to do is:
- Enter the recipient email addresses (you can fill a maximum of five email ids). Please ensure you fill the email ids with a comma and no space.
- Fill the email subject and email body that you’d want to see and Save Changes.
