Creating Email Campaigns is now simpler than ever. Our Email Creator will equip you to design the most engaging and functional Email Campaigns in a matter of minutes.
Here’s a video demonstration to help you get started!
Step 1
Create a new Email
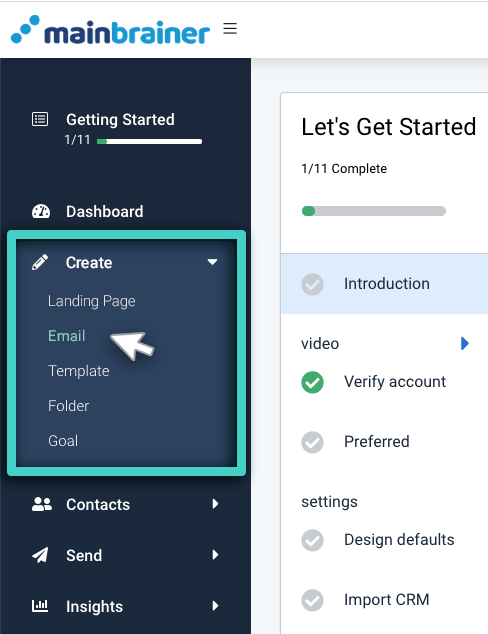
Use the Main Menu on the left to expand the Create menu and click Email.
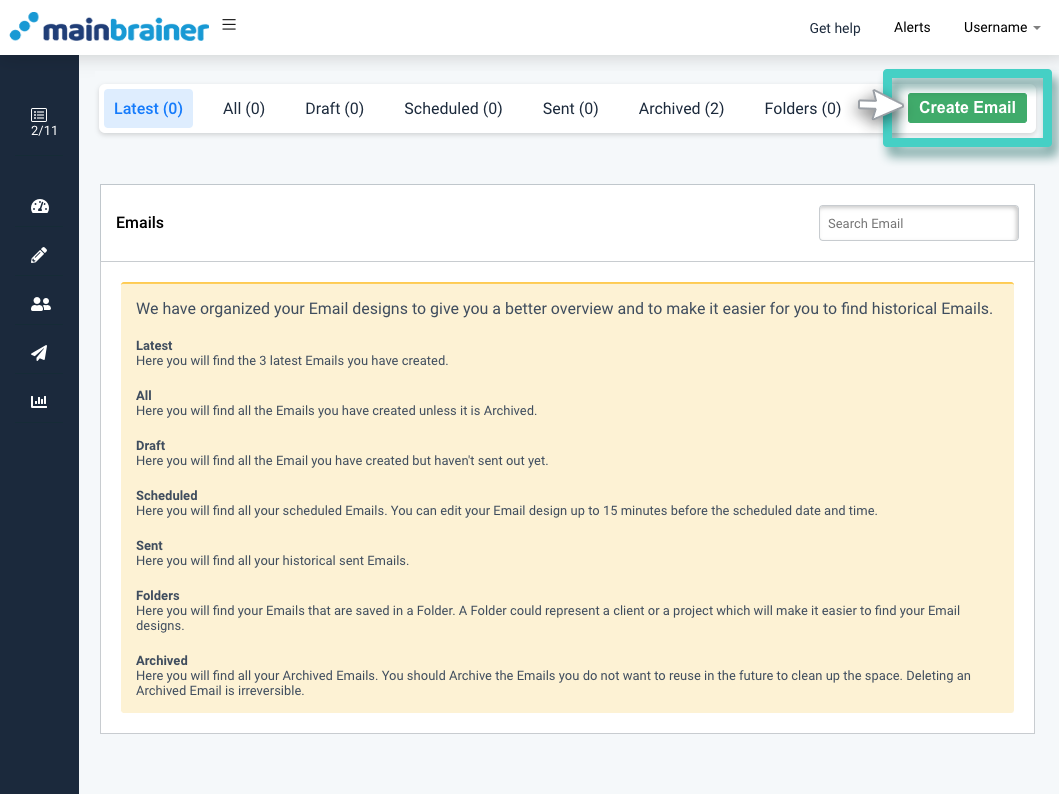
You will be redirected to the Email Manager. As you create your Emails, the Emails will get listed here. Click Create Email and proceed to the next step.
Step 2
Name and describe your Email Campaign.
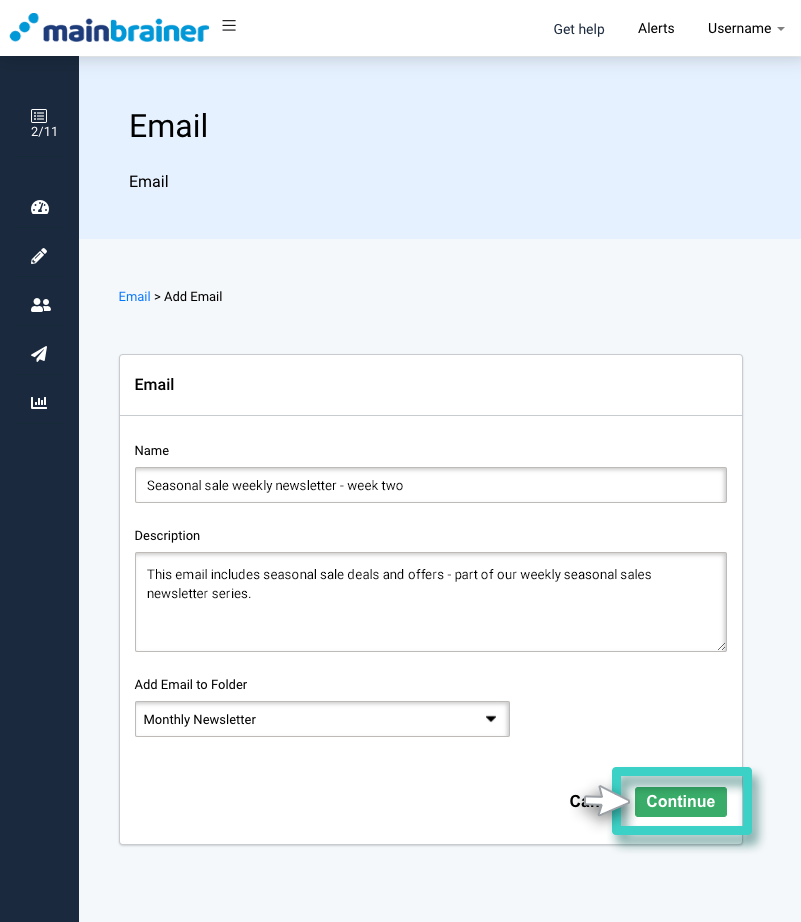
You can keep the default name by clicking Continue, but we recommend that you add an explanatory name and description for easier campaign identification in the future.
Herein, use the fields:
- Name to give your Email campaign a descriptive name
- Description to add a relevant description for this Email campaign. It could be anything – for example, what audience this Email campaign is targeting, the occasion for which you plan to distribute this Email Campaign, or is it intended to be a part of a special campaign?This description is purely for your reference, to help you search for and identify this particular Email Campaign later. Your customers will not see this, so make it as informative as you want.
- Add Email to Folder dropdown to select the Folder to which you would like to add this Email Campaign. While adding your Email Campaign to a folder is optional, we recommend using this feature if you are working with several customers or different projects.
Once you have entered the above details, click Continue.
Step 3
Select a Template or Layout.
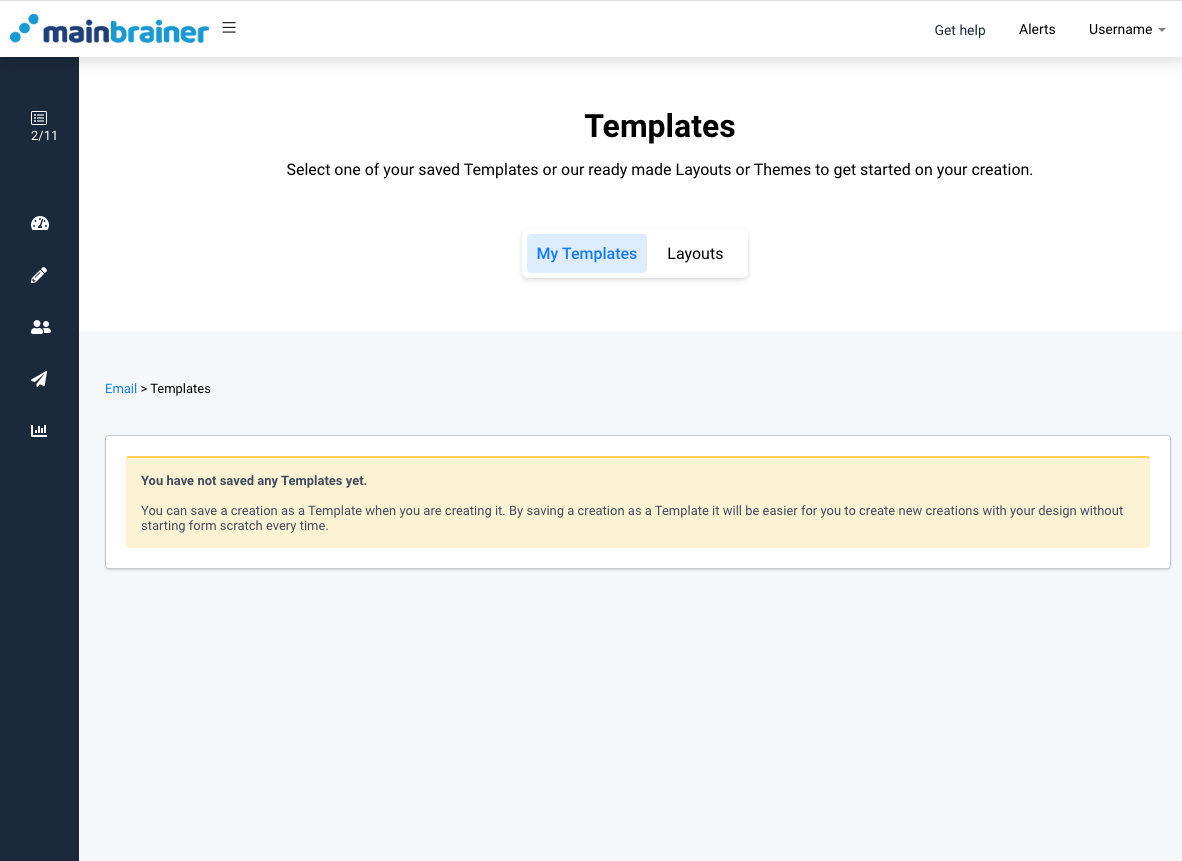
The My Templates tab lists the Email campaigns that you have previously saved as templates. Since you are creating your first Email campaign, this section will appear blank. Once you start creating Email campaigns, you can save your campaign designs as templates (as explained in Step 6 of this article) to use as starting points for your subsequent campaign design requirements.
For now, open the Layouts tab and select the blank template to start with an empty page, and start designing your Email campaign.
Step 4
Design your Email Campaign.
(Before you start designing your Email Campaign, do check out our Email Campaign designing guide for some tips and tricks on designing eye-catching Emails!)
The area marked The Work area in the screenshot below is the space where you can design your Email Campaign. Every design element you need to build your Email Campaign is available as a Widget in the tools section on the right-hand side.
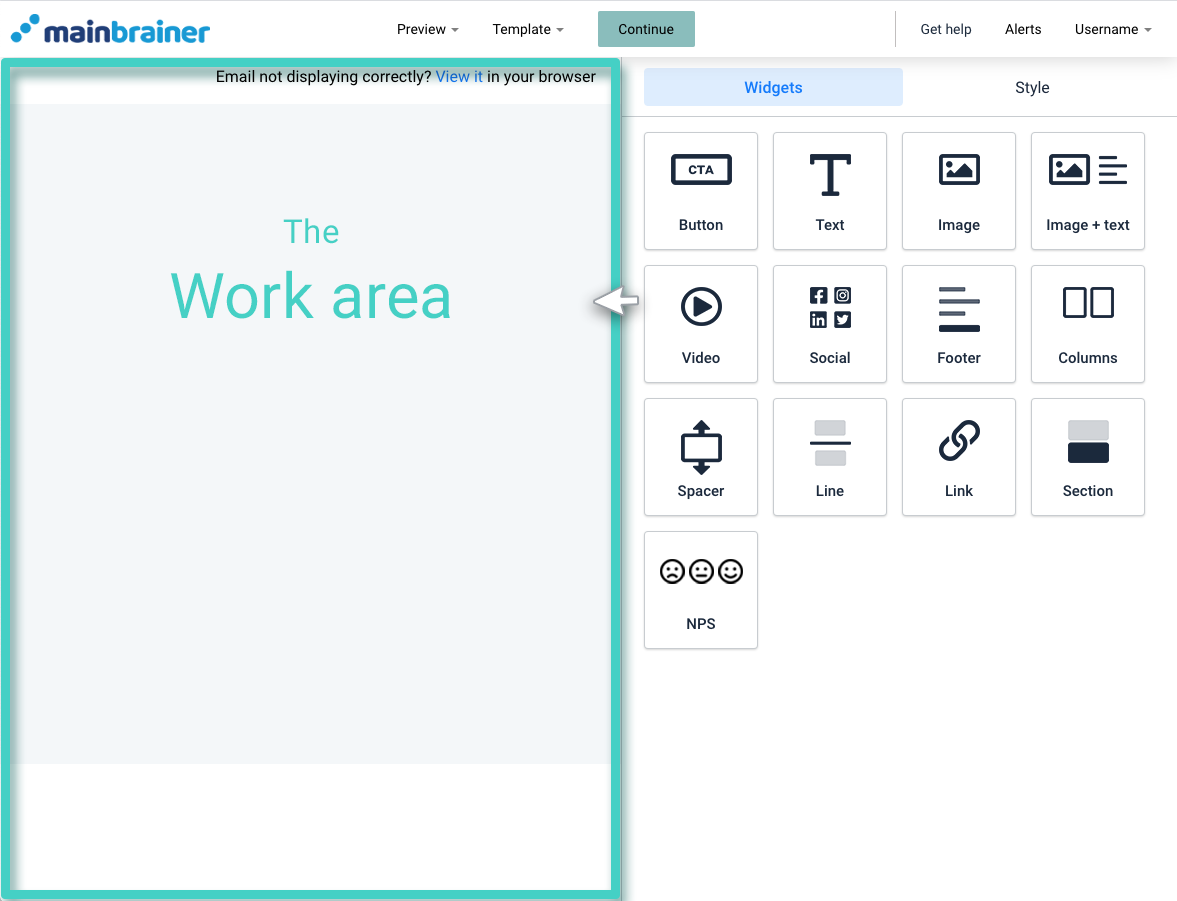
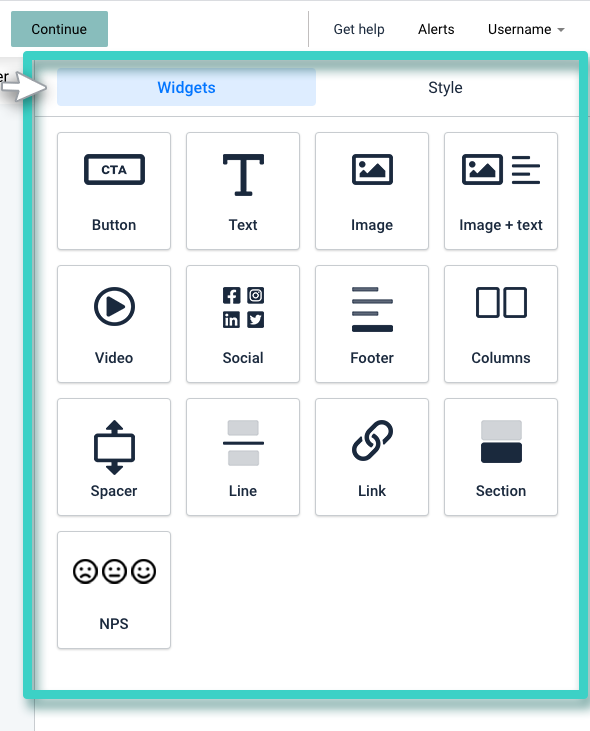
The right-hand side tool section has two tabs:
1. The Widgets tab
2. The Style tab
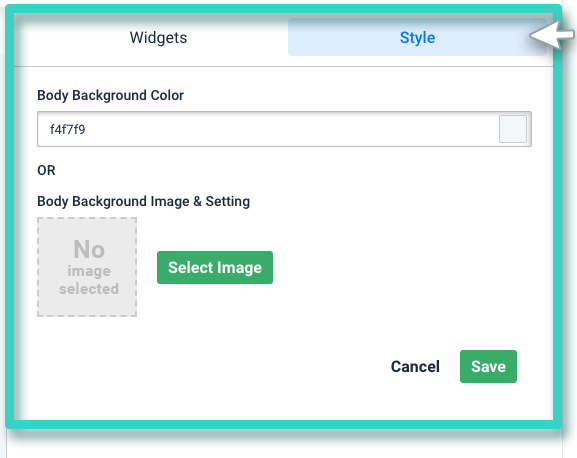
Within the Style tab you can customize the work area and the body background as you like.
Within the Widgets tab you’ll find all the Widgets (i.e., the design elements) that you need to build your Email. Drag and drop the required widgets to the work area and design your perfect Email Campaign.
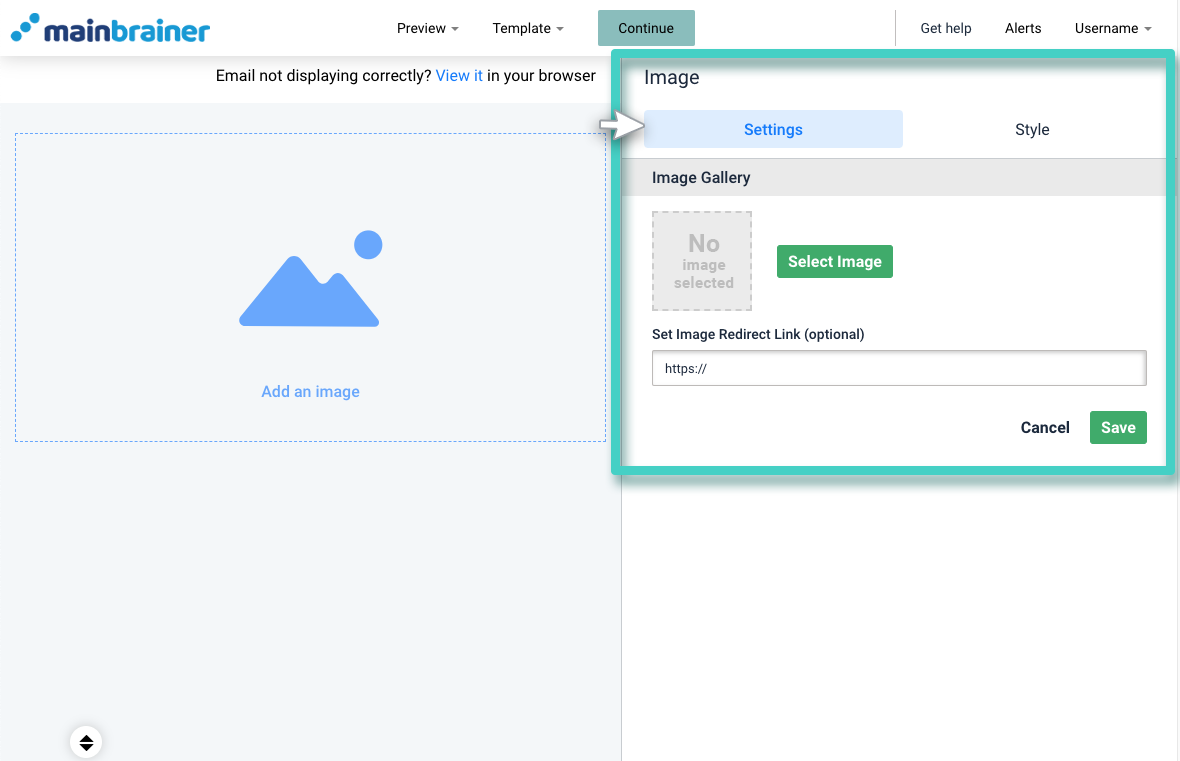
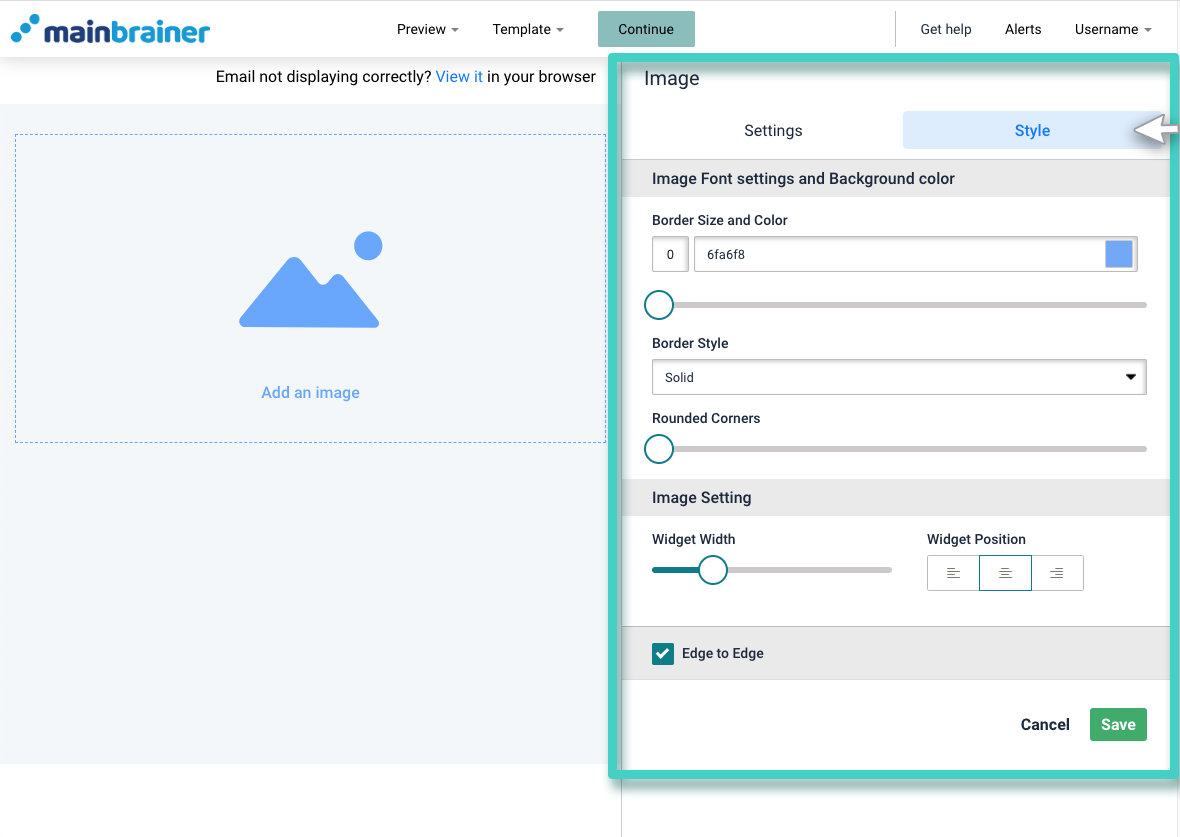
As you drop a widget into the work area, you can make necessary adjustments to its look, feel and usage by using the Settings and Style tabs (as shown in the screenshot below).
Step 5
Preview your Email Campaign.
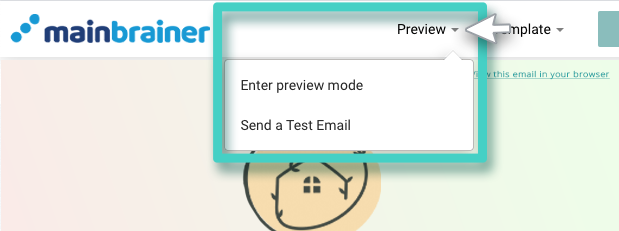
Once you have designed your Email Campaign, click Preview and use the Enter preview mode option (as highlighted in the screenshot below) to see how your Email Campaign will appear to your recipients. You can also use the Send a Test Email option to send a test Email to your Email address.
Step 6
Save your design as a template.
In case you intend to reuse this Email Campaign design in the future (with modifications or as-it-is), we recommend that you save the design as a template. Doing so will ensure that the next time you create an Email Campaign, this design is readily available under My Templates on the template selection screen (See step 4).
Click Template and Save this design as a template(as shown in the screenshot below).
If you wish to switch templates, you can do so by using the Switch templates menu option.

Step 7
Activate your Email campaign.
Once satisfied with your design, click Continue.
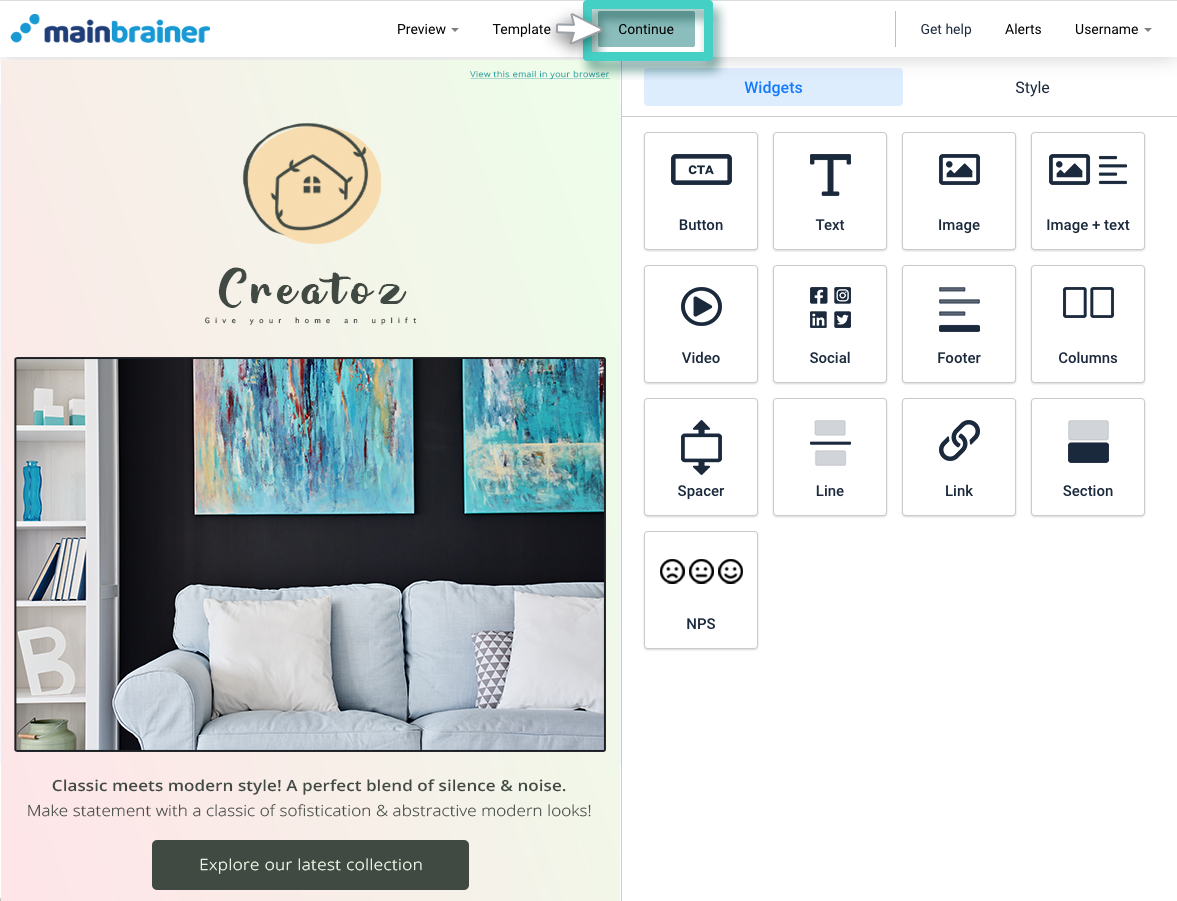
You will be redirected to the Email Campaigns listing page. Before you can send this Email Campaign to your contacts, you’ll need to activate it using the Activate button (as highlighted in the screenshot below).
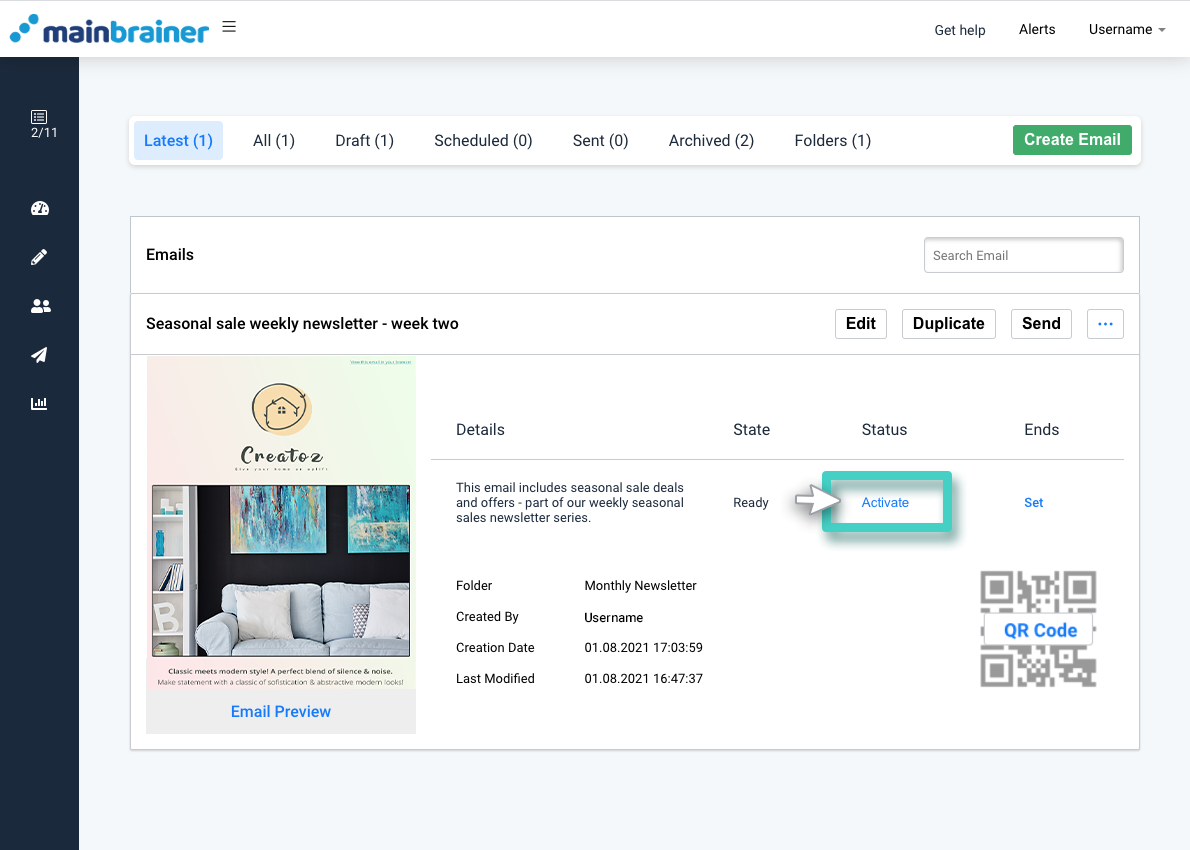
Follow the instructions by selecting an Activation Time, a Closing Time, and a Watermark Text, and then remove the watermark by clicking Remove Watermark.
And just like that, you have successfully created your first Email Campaign in Mainbrainer that is ready to be sent to your audience!
Feel free to play around with our Email creator widgets and keep designing and sending engaging Email Campaigns that capture your audience’s attention!
Also, it’s not always necessary to create Email Campaigns from scratch. In case you wish to create a campaign that is minutely different from a previously created one, you can always modify the pre-existing Email Campaign to save time!
