The Calendar widget helps you share a Calendly meeting invite with your customers and invites them to book their calendars as per their convenience from your landing page itself.
The Upside:
Your customers can book meetings and appointments with you directly from your landing page, doing away with the need for you to separately manage your calendar and invitations.
For example:
Suppose you are a business that wants to set an appointment for in/knowledge-base/person visits with your customers, or you want to intimate your customers and block their calendar for an exclusive showcase event. In that case, this widget will come in very handy! You can also use this widget on your thank/knowledge-base/you landing pages after visitors have signed up and invite them for a product walkthrough and onboarding session. The possibilities are endless!
The widget currently supports meeting links generated on Calendly. Calendly is a free meeting scheduler tool widely used by marketers worldwide to schedule meetings with their team members and customers. Calendly uncomplicates scheduling by only offering times that work with your availability across all of your calendars.
Once you have set a meeting up on Calendly, copy the meeting URL and keep it handy. You’ll need it to configure the calendar widget on your landing page. Let’s proceed and see how!
How to use a Calendar Widget in a Landing Page
Step 1
Navigate to the landing page builder
Use the Main Menu on the left to create a landing page and navigate to the landing page builder.
Step 2
Add a Calendar widget to the landing page
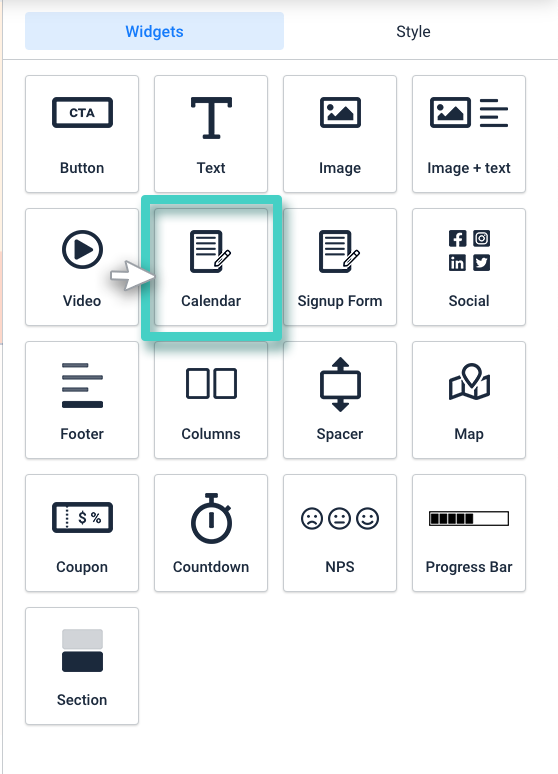
The blank area on the left is the work area where you design your landing page, and the area on the right is the tools area where all the available design elements are displayed as widgets.
In order to add a meeting invite to your landing page, drag and drop the Calendar widget to the work area (as highlighted in the screenshot below).

Step 3
Configure the calendar widget as per your requirements
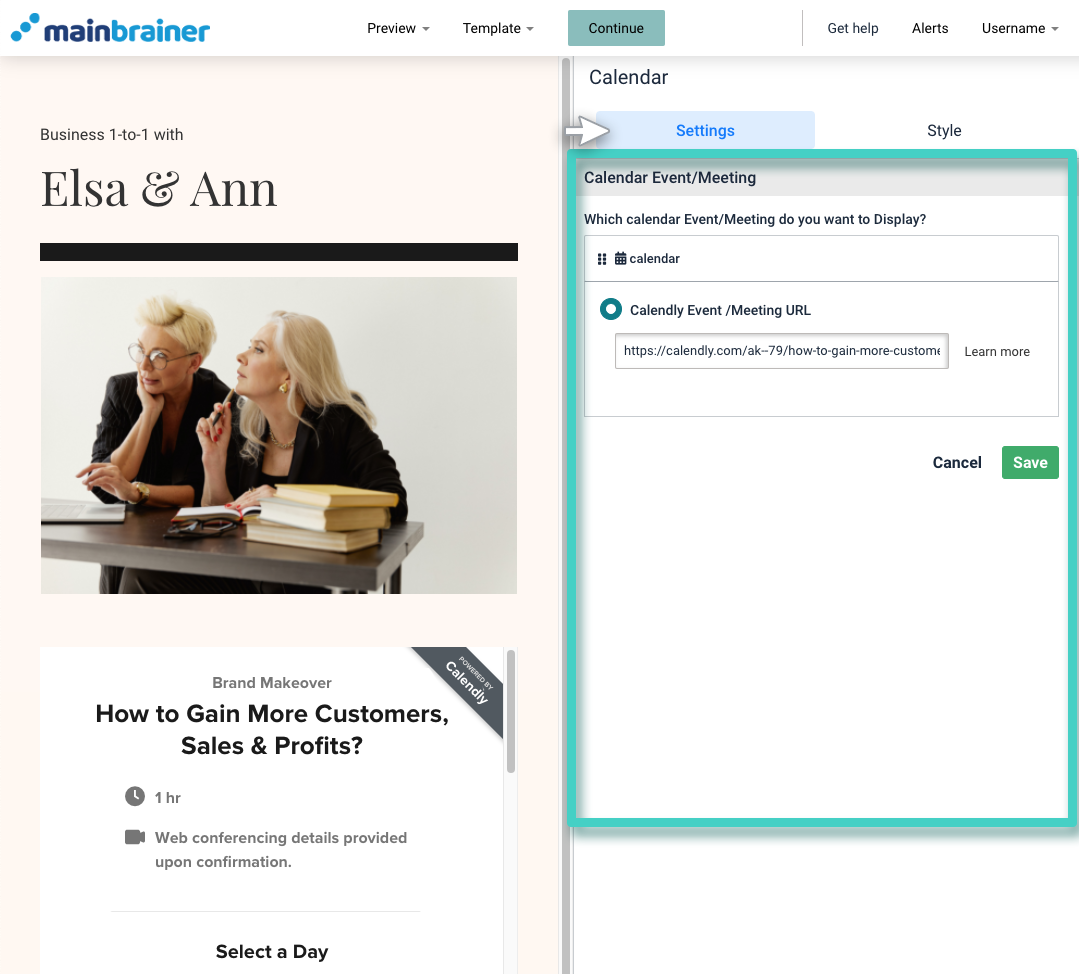
Once you drop the widget into the work area, the widget Settings are displayed on the right (as highlighted in the screenshot below). Use these settings to configure the calendar widget as per your requirements.
Herein, use the Calendly Event /Meeting URL field to specify the URL of the Calendly meeting that you wish to add to your landing page.

Step 4
Style your Calendar widget
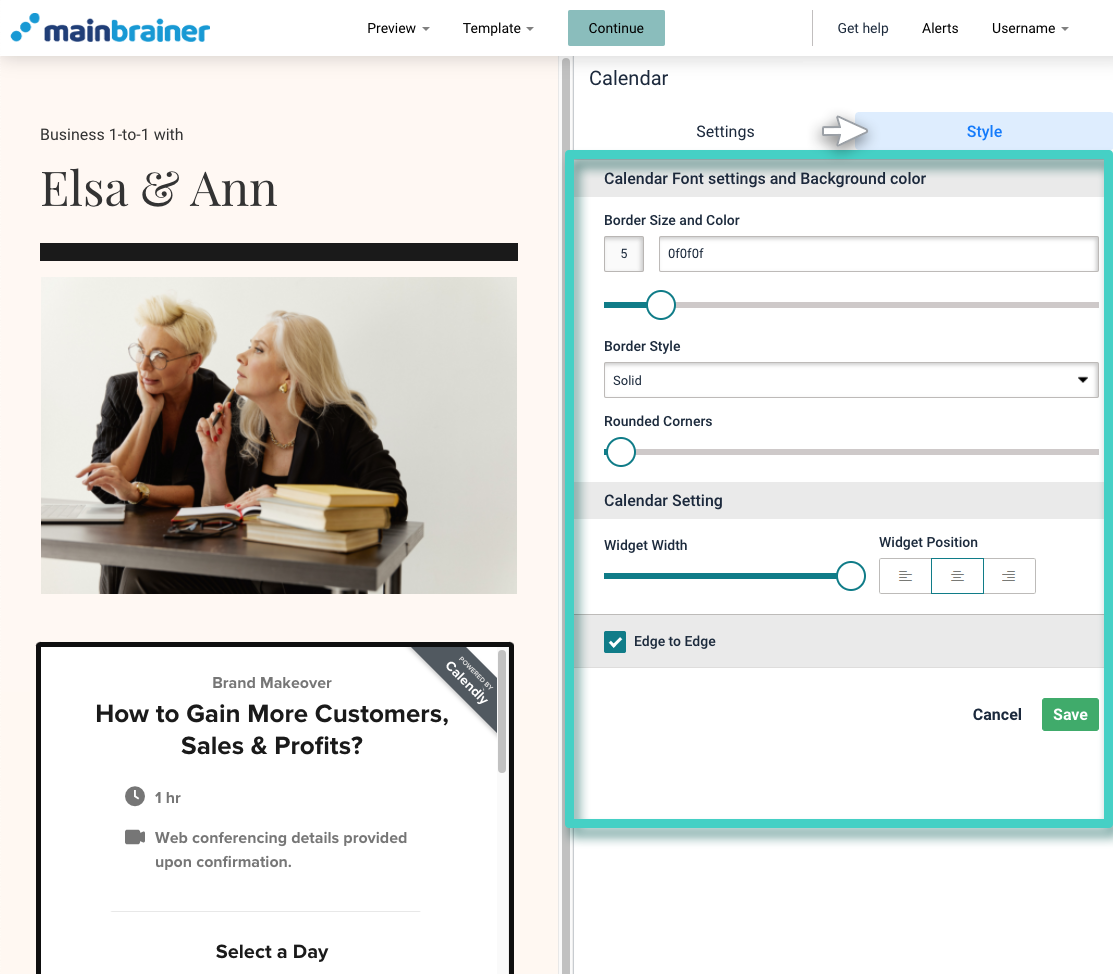
You can edit the appearance of the calendar widget by clicking the Style tab (as highlighted in the screenshot below).

Herein, the different design options available are:
4.1 Calendar Font and Color Settings
Use the options available under this section to style the border of the calendar widget as per your design preferences.
4.2 Calendar Setting
Use the options available under this section to adjust the width and alignment of the calendar widget.
Click Save and that’s it!
You have successfully added a Calendly invite to your landing page!
Let’s proceed, and have a look at how to add a Signup Form to a landing page using the Signup Form Widget!
