The NPS widget helps you add an NPS survey form to your landing page.
Net Promoter Score (NPS) is a globally recognized and widely accepted metric that helps you measure your customers’ loyalty and satisfaction.
How to use an NPS widget in your landing pages?
Step 1
Navigate to the landing page builder
Use the Main Menu on the left to create a landing page and subsequently navigate to the landing page builder.
Step 2
Add an NPS widget to your landing page
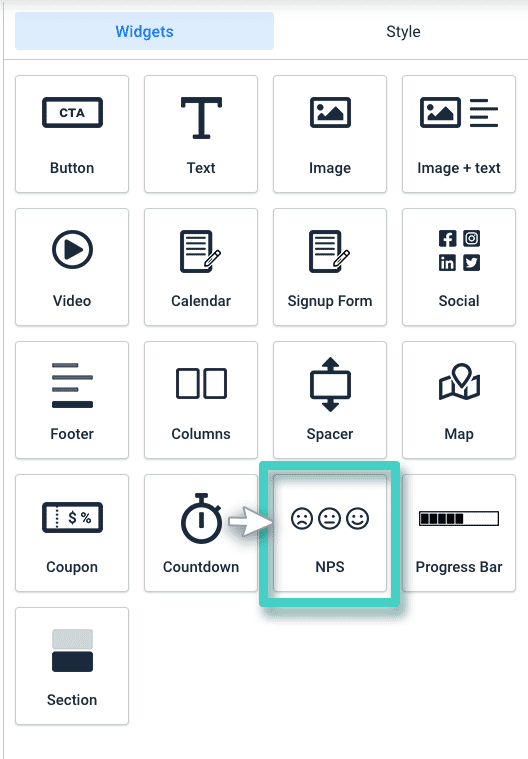
The blank area on the left is the Work area where you design your landing page, and the area on the right is the tools area where all the available design elements are displayed as Widgets.
In order to add an NPS survey form to your landing page, click the NPS widget icon or drag and drop it onto the work area.

Step 3
Edit the NPS widget texts to customize your NPS form as per your preferences.

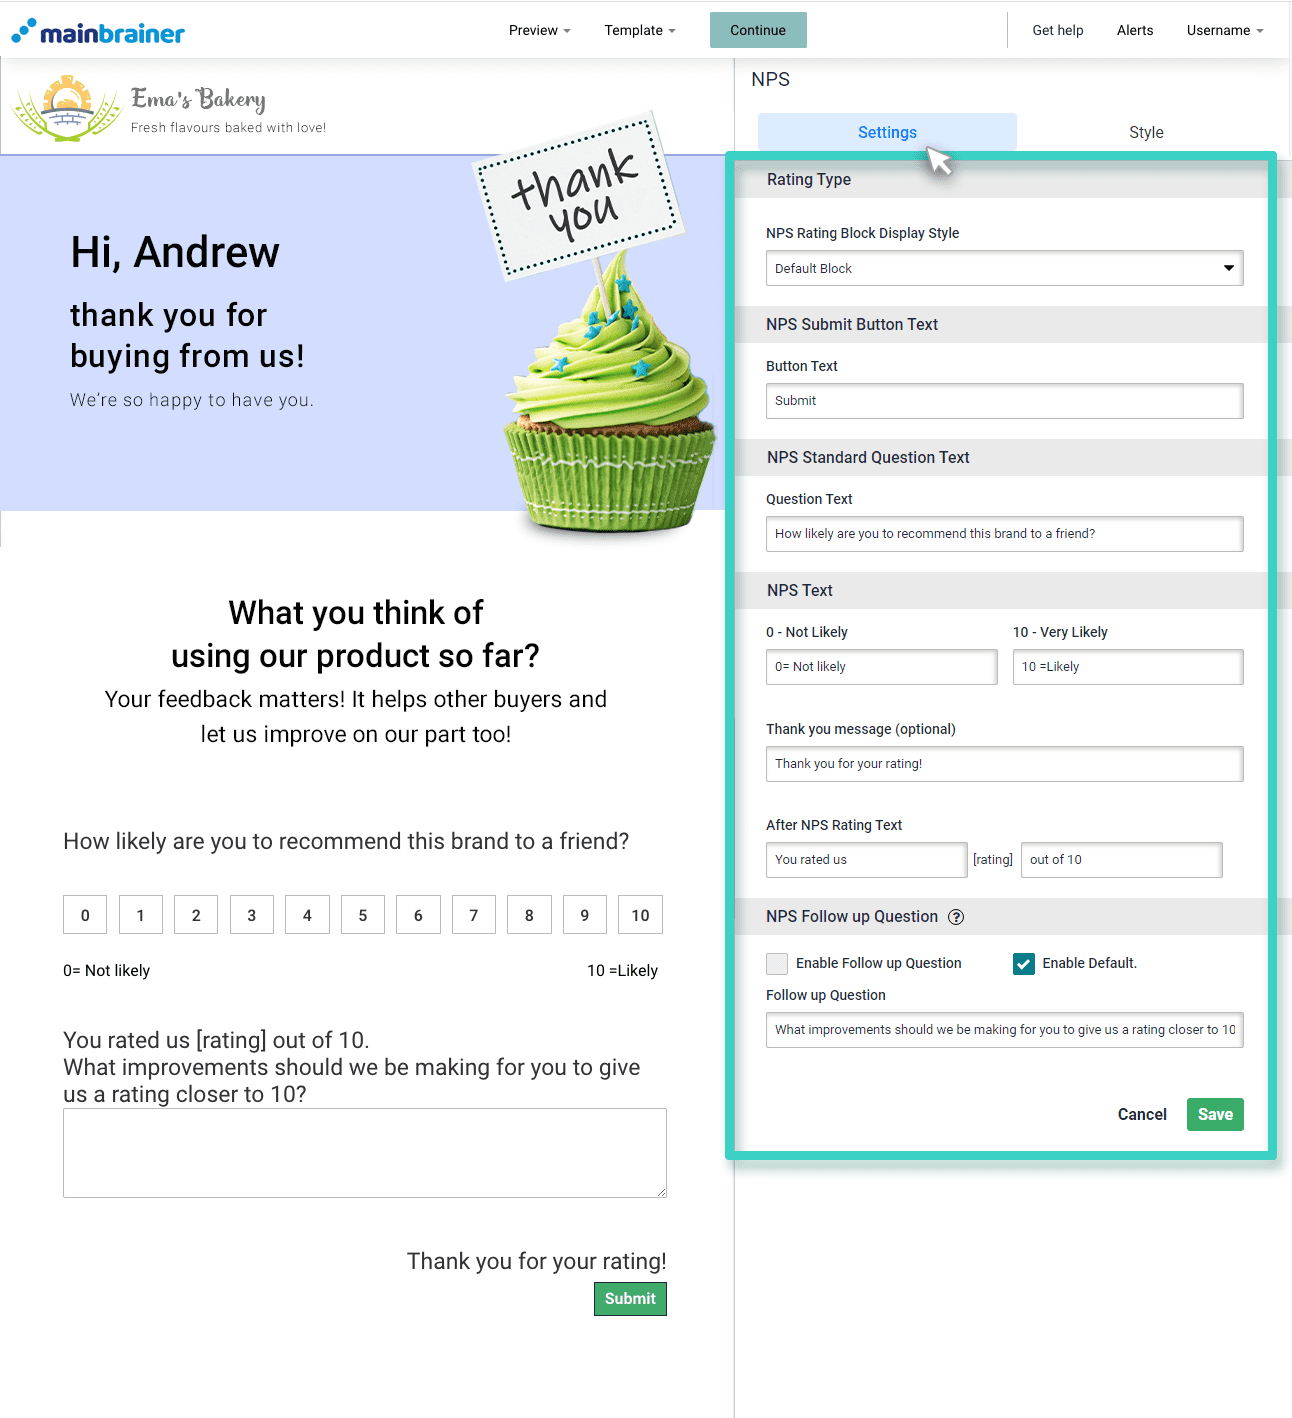
As you drop the widget into the work area, the widget settings are displayed on the right (as highlighted in the above screenshot)
Here’s what the different sections under Settings mean:
- Rating Type lets you select:
- NPS Rating Block Display Style to edit how the rating scale appears to your audience.
- NPS Submit Button Text – It allows you to edit the Button Text as it appears to your audience.
- NPS Standard Question Text – Use this section to customize the text of your NPS survey question.
- NPS Text– Use this section to:
- Specify the pointer texts that you wish to display below the extreme ratings (0, 10)
- Specify the text for a Thank you message – This text is displayed to the user once they submit the survey.
- Specify the After NPS Rating Text – This text is displayed to the user when they click on a score (on the 0-10 scale on the NPS widget).
- NPS Follow-up Question– Use this section to add a follow-up question to your NPS form. Herein, you can
- Enable a follow-up question, or
- Choose to Enable Default – If you choose to enable default, a follow-up question will be displayed only if a customer enters a rating of 6 or less. But if you choose to enable a follow-up question, the follow-up question will be visible regardless of the customer’s rating.
- Edit your Follow up Question that you want to ask your audience.
We recommend that you always enable a follow-up question for your NPS survey. Doing so helps you seek additional comments/ remarks from your customers. These customer comments can provide valuable insights into your customers’ pain points and expectations from your brand.
Step 4
Style your NPS widget.
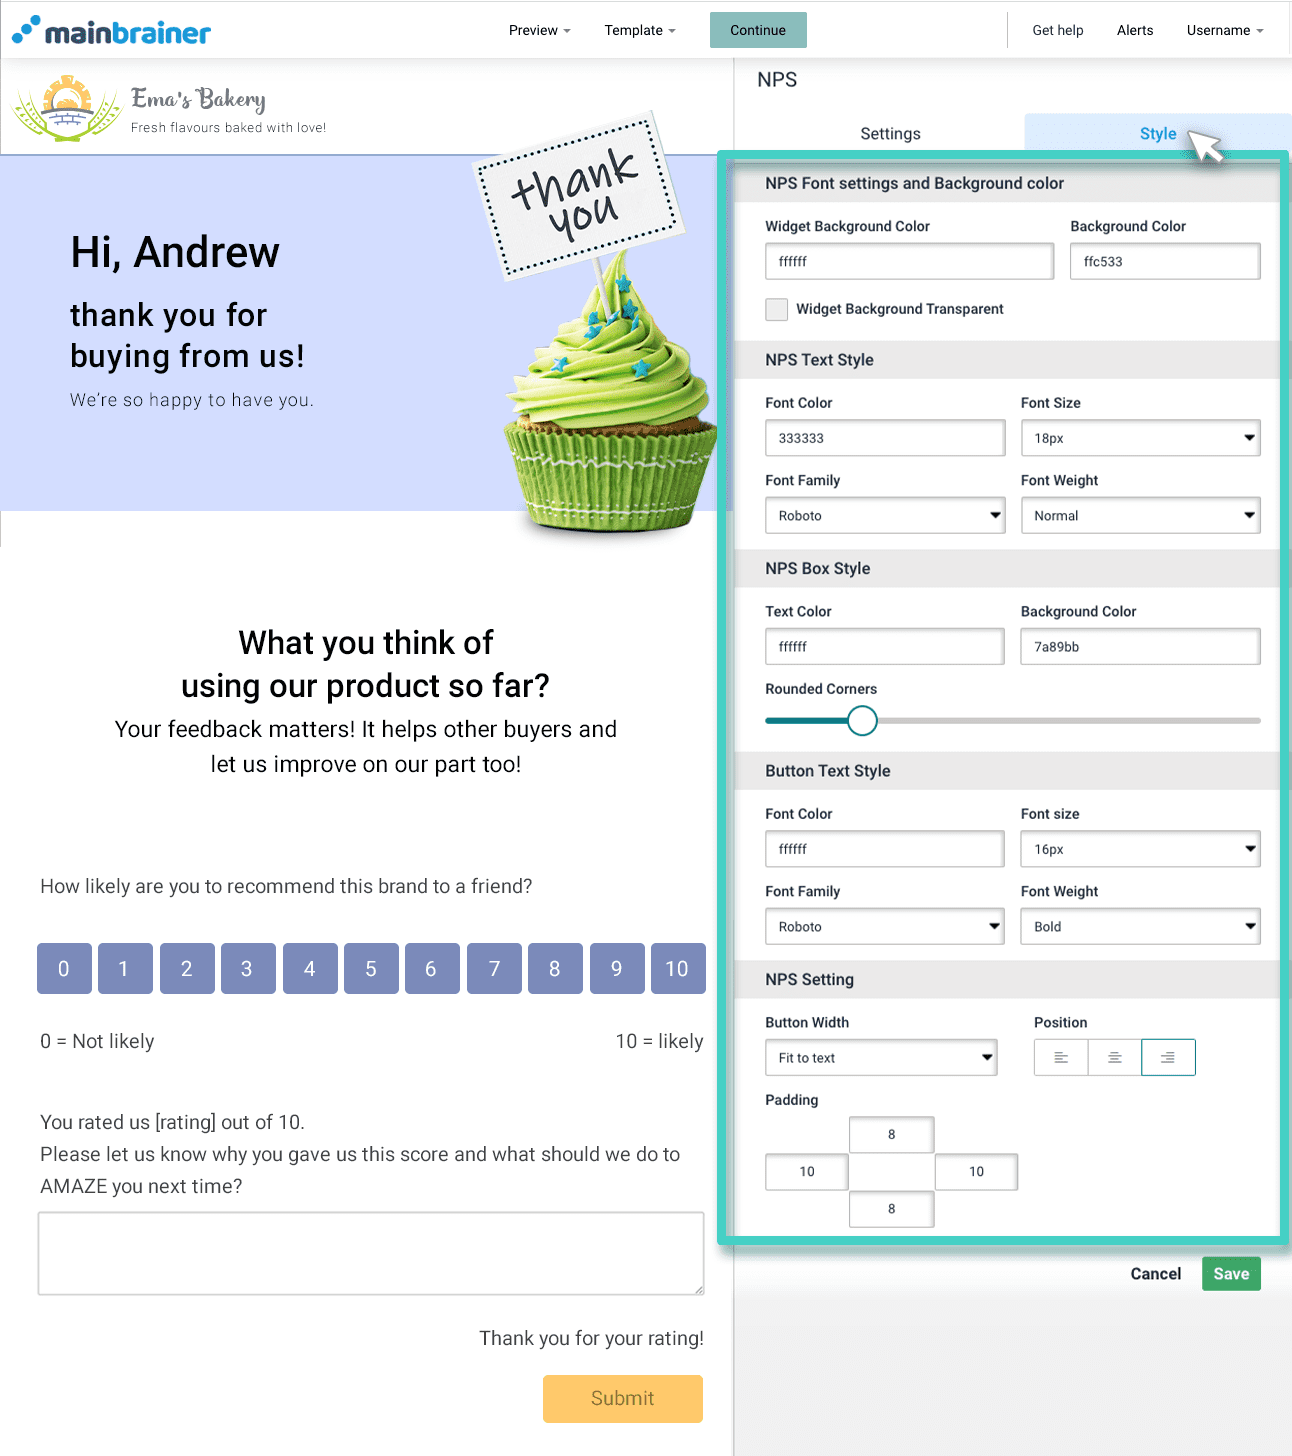
Use the options under the Style tab to customize the look and feel of the NPS widget.

Herein, the different design options available are:
4.1 NPS Font settings and Background color
- Widget Background Color – use it to change the color of the widget background. You can also choose to make the widget background transparent.
- Button Background Color – use it to change the background color of submit button.
4.2 NPS Text Style
Use this section to customize the fonts used in the NPS widget.
4.3 NPS Box Style
Use this section to customize the text color and the background color for the rating scale displayed in the NPS widget. You can also scale the roundness of the NPS Box’s corners.
Note: While you can alter the roundness of the corners when you select Default Block or Merged Rating Block in NPS Rating Block Display Style, you cannot do so when you select NPS Pod.
4.4 Button Text Style
Use this section to customize the font settings of the Submit button.
4.5 Button Setting
Use this section to customize the width, position, and padding of the Submit button as per your design preferences.
Click Save and that’s it! You have successfully added an NPS form to your landing page.
Let’s proceed, and have a look at how to add an animated progress bar to a landing page using the Progress Bar Widget!
