Composing and sending out SMS Campaigns is now easier than ever with MainBrainer.
Here’s a video demonstration for your quick reference:
Step 1
Navigate to the SMS Sending screen
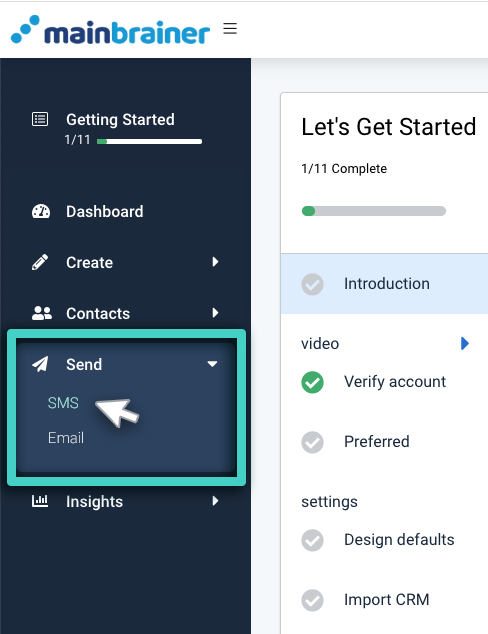
Using the Main Menu on the left, expand the Send dropdown menu and click SMS.
As you click SMS, you’ll need to enter a name and description for this sending in the subsequent screen. Enter a relevant name and description, something that will make the identification easier in the future. This name and description will be used to display the list of scheduled sendings on your dashboard.
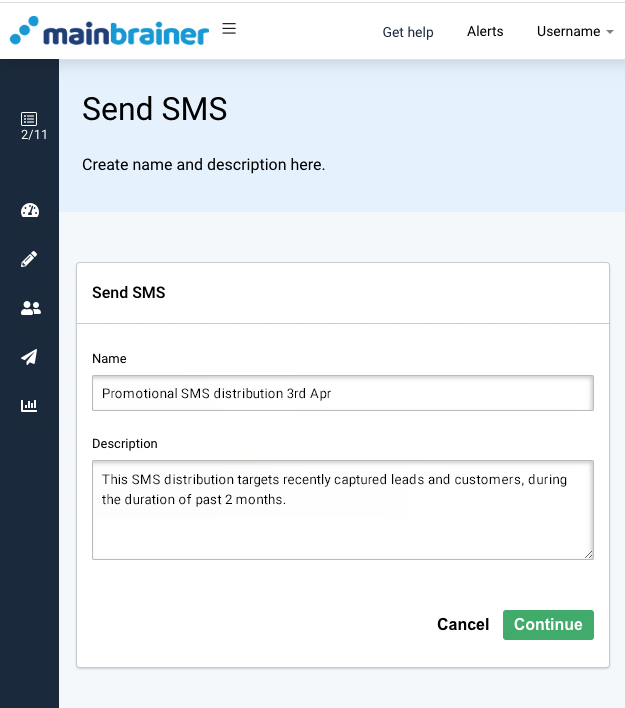
As you click Continue, you will be redirected to the SMS Sending screen.
Step 2
Choose Your SMS Recipients
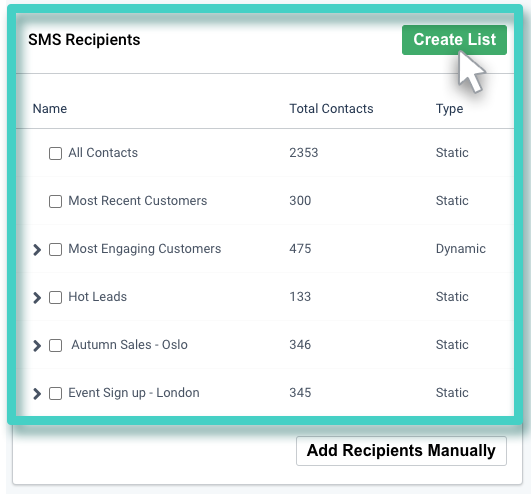
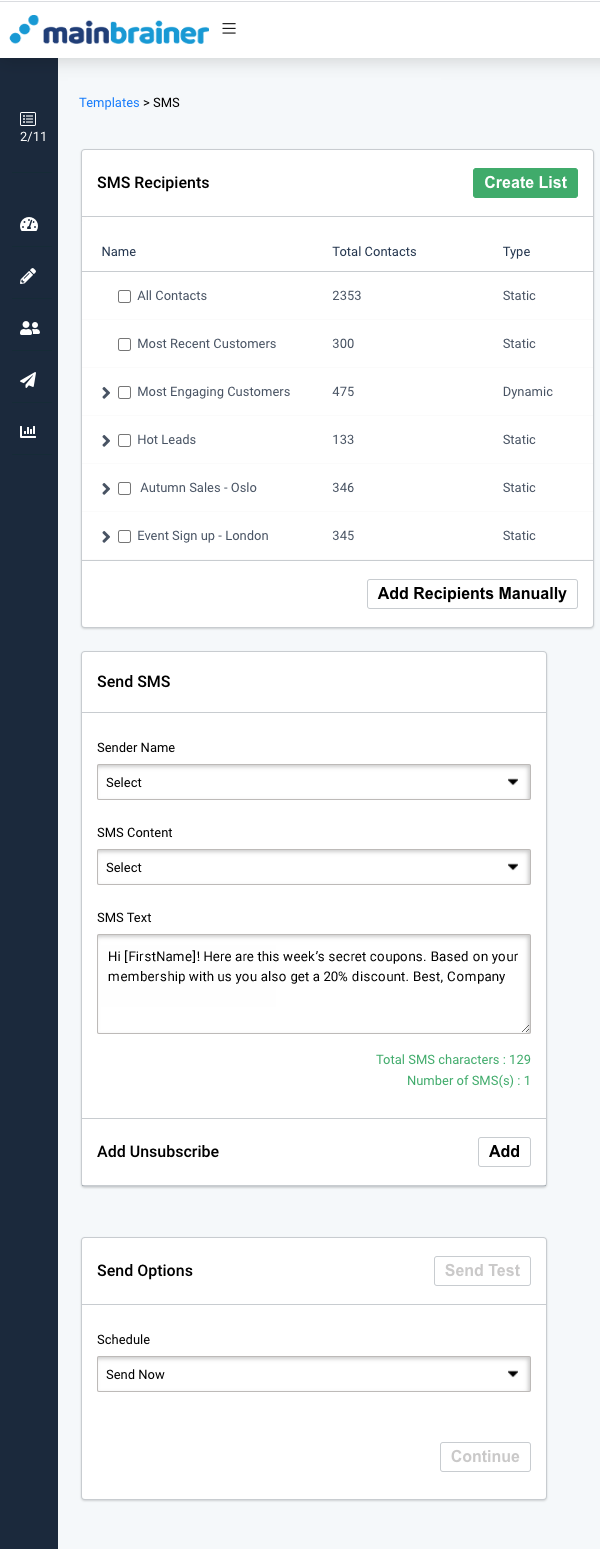
The area highlighted in the screenshot above displays a list of all your contact lists. Use it to select the contacts you would like to send the campaign to. Herein,
- Use the checkboxes under the Action tab to select the contact lists to which you wish to send the campaign.
- If you would like to create a new list with a different set of contacts, you can do so by clicking the Create List button in the top right corner of the highlighted area.
- If you would like to add the recipients manually, click Add Recipients Manually.
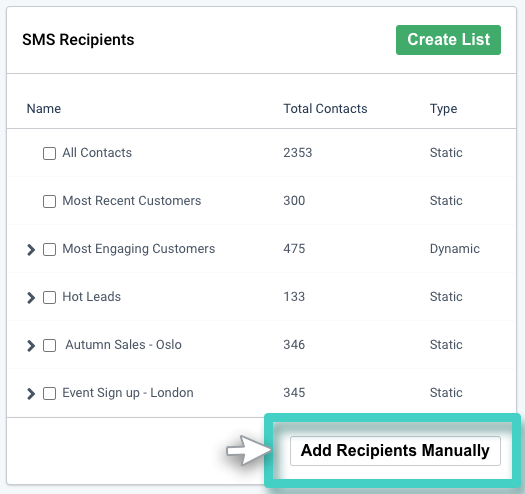
As you click Add Recipients Manually, the following section appears:
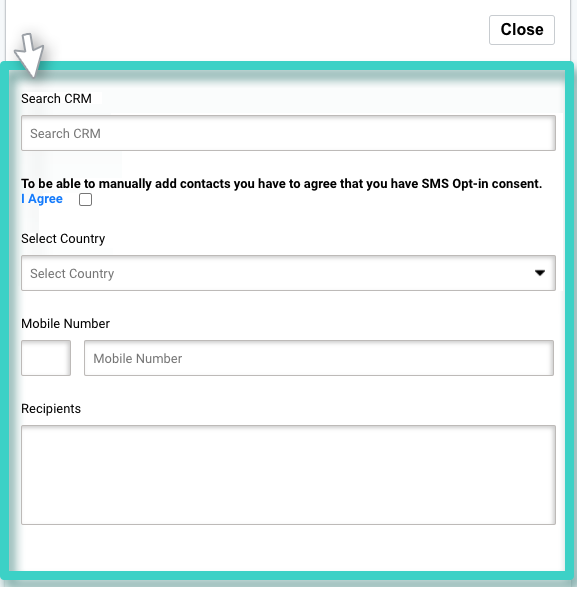
In this section, use the fields:
- Search CRM to search the CRM for a contact that already exists in the CRM. You can search for the intended contact by entering either the name or the mobile number in the search field. Select the intended contact from the dropdown.
- If you need to add contacts manually, first make sure you have the contacts’ SMS opt-in consent and then check the I Agree checkbox.
- Select Country to choose the country where the recipient’s mobile number is registered.
- Mobile Number to enter the mobile number of the intended recipient, and click Add.
- Recipients to view the list of manually added recipients.
Note: All the contacts added here manually will also be added to the CRM with their SMS status as Opted-in.
Suggested Reading: Single Opt-in Signups and Double Opt-in Signups.
Step 3
Type in Your SMS Content
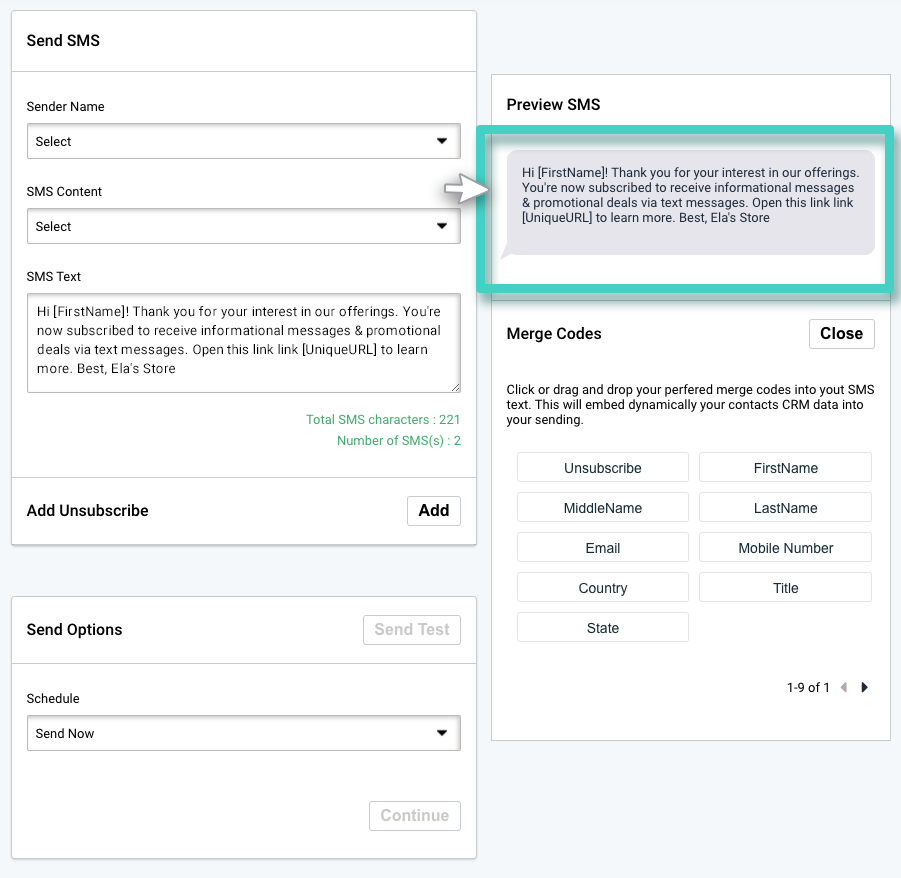
Use the area shown in the screenshot below to enter the SMS content and sender details:
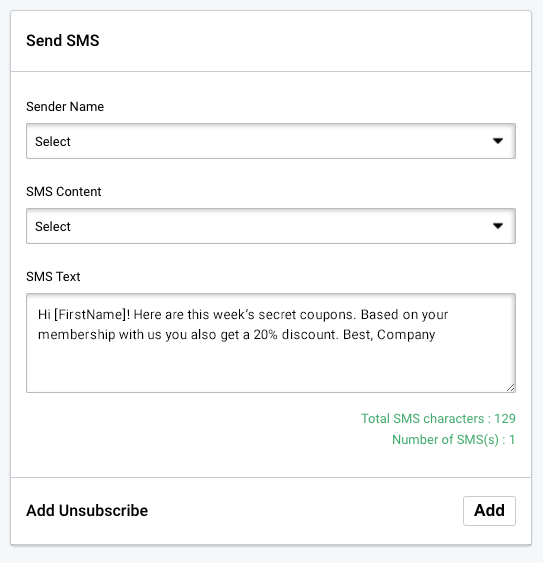
In this section, use the fields:
- Sender name to select the Sender Name for this campaign sending. This name helps the SMS recipients identify who the sender of the SMS is. Use the option Create New from the dropdown menu to create a new sender name.
- SMS Content to select the type of content that you want to send in this sending.
- SMS Text to enter your text.
In the subsequent fields as you type-in/select the SMS content a Preview area opens on the right side (As highlighted in the screenshot below). This area displays the SMS as it will appear in your recipients’ inbox.
-
Merge Codes
A list of available merge codes is displayed on the right side (visible under the Preview SMS section as shown in the screenshot above).
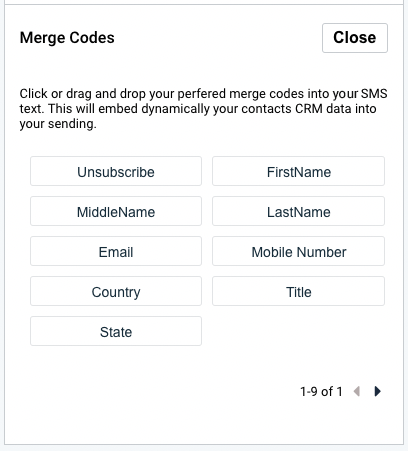
Merge codes allow you to add dynamic content to your SMS Text. Drag and drop the required merge code(s) into the SMS Text field as required. The merge codes will get dynamically replaced by the corresponding CRM data at the time of SMS sending.
Note: The list of available merge codes depends on the list of SMS recipients chosen in Step 2. Only the merge Codes corresponding to the common data fields of these lists would be available for use.
-
Add Unsubscribe
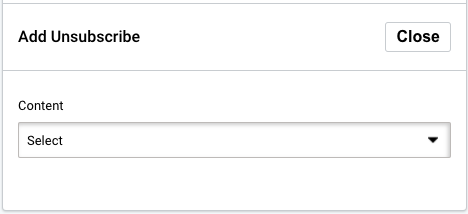
Click Add if you wish to add an unsubscribe option to your SMS. In the menu that subsequently opens (see screenshot below), specify if you would like to add the link to an unsubscribe form or if you would like to add an Unsubscribe keyword and shortcode to the text.
Step 4
Send Options
Now that you have composed your SMS, it’s time to send it and let the world know!
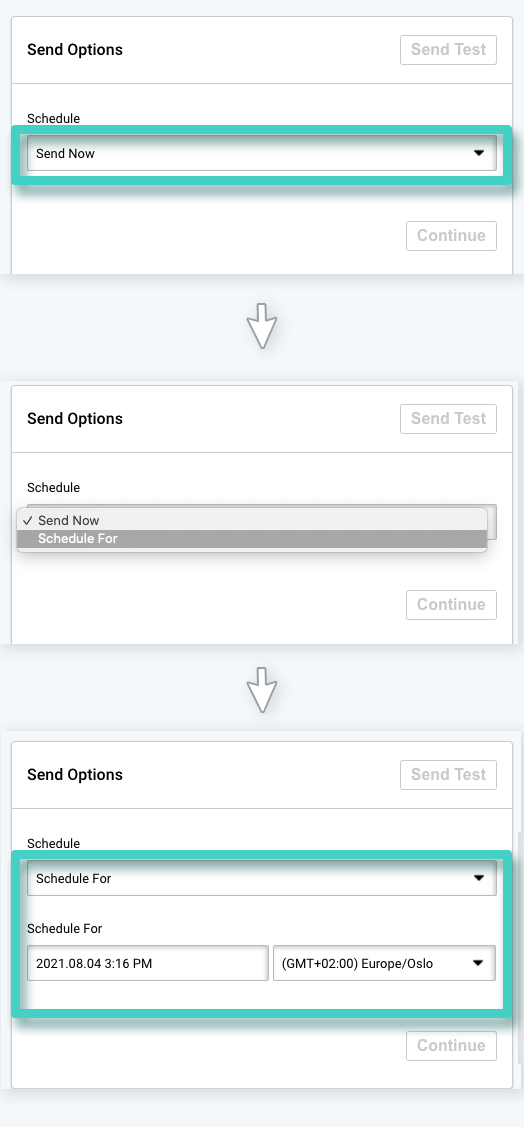
Use this section to specify if you would like to:
- send your SMSs immediately, or
- schedule your SMS sending for a later time/date.
Step 5
Set Goals For SMS Sending
In case you would like to specify the desired end goal for this SMS Sending, click Set Your Goals.
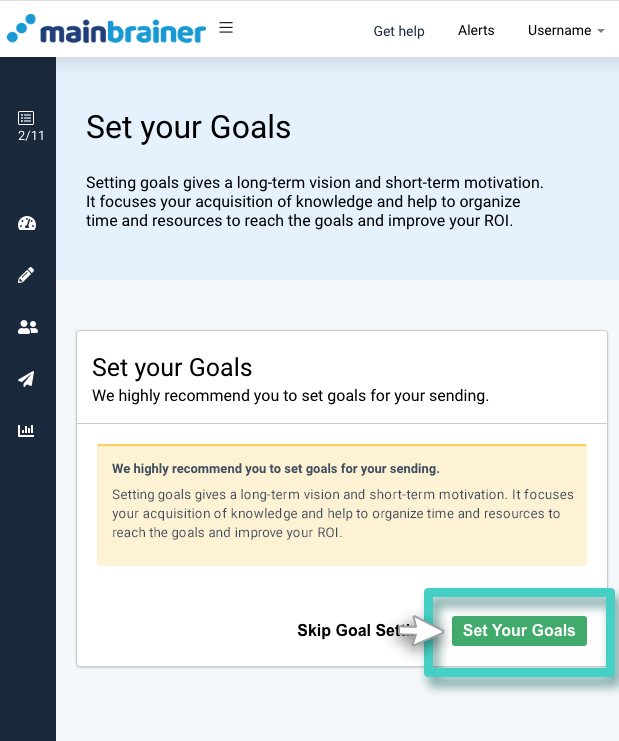
The subsequent screen displays KPIs for the different goal types. Enter the intended goal rate for the KPIs that you wish to monitor.
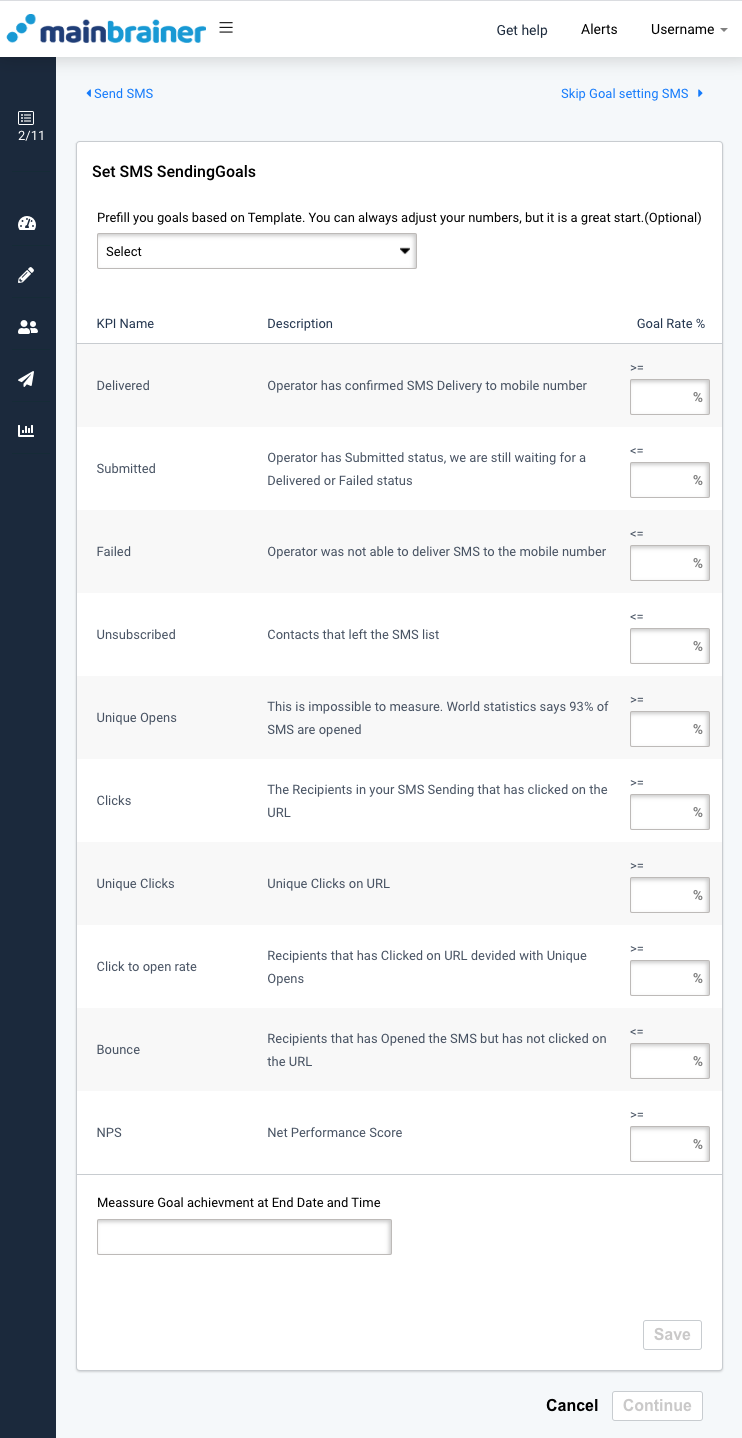
Note: Although this step is optional and can be skipped using the button Skip Goal Settings, we highly recommend that you always set goals for your campaign sendings. You can set sending goals either at the time of SMS Sending, or set goals at any later time. Doing so makes your work easier when it comes to campaign performance analytics. Just a glance at our insights section helps you see which sendings met their intended goals and which ones didn’t.
Step 6
Send Your SMS Campaign
The subsequent screen displays the summary of your SMS campaign along with a preview of how the associated landing page would appear on a mobile screen.
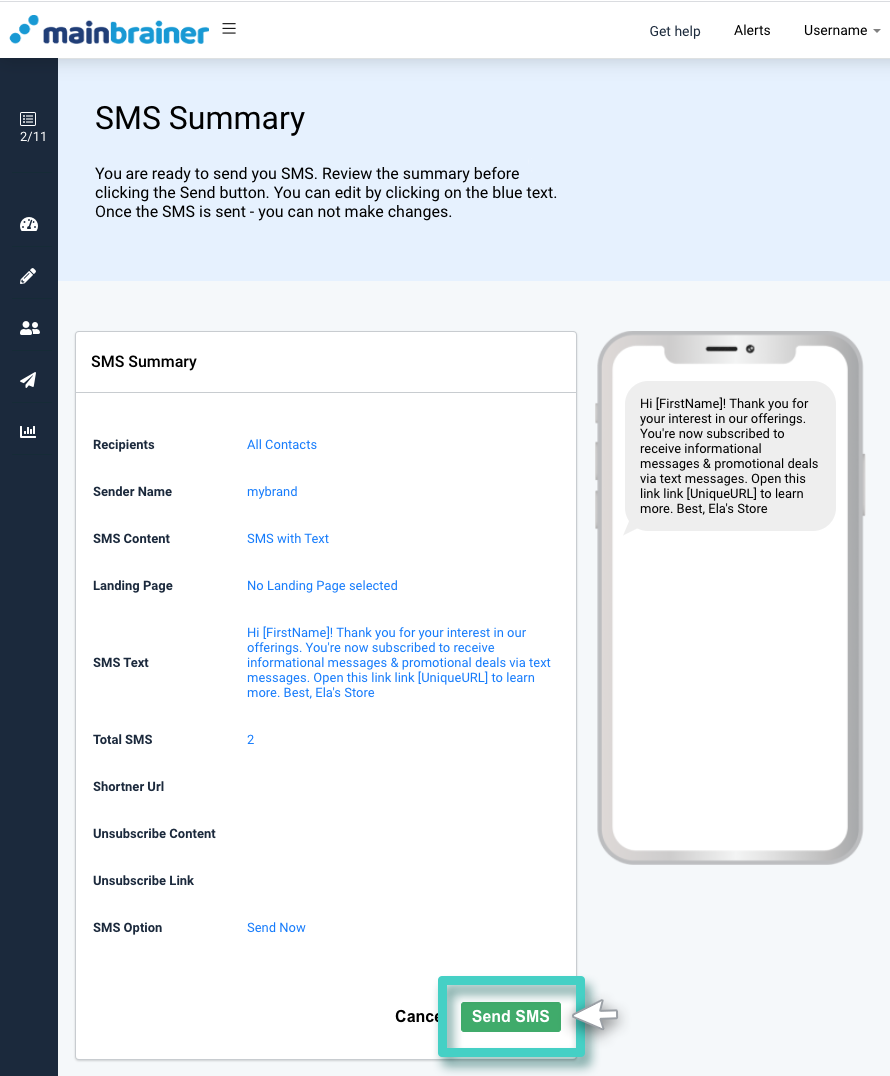
Double-check to ensure that all details are correct. Once you are sure, click Send SMS to send out the campaign!
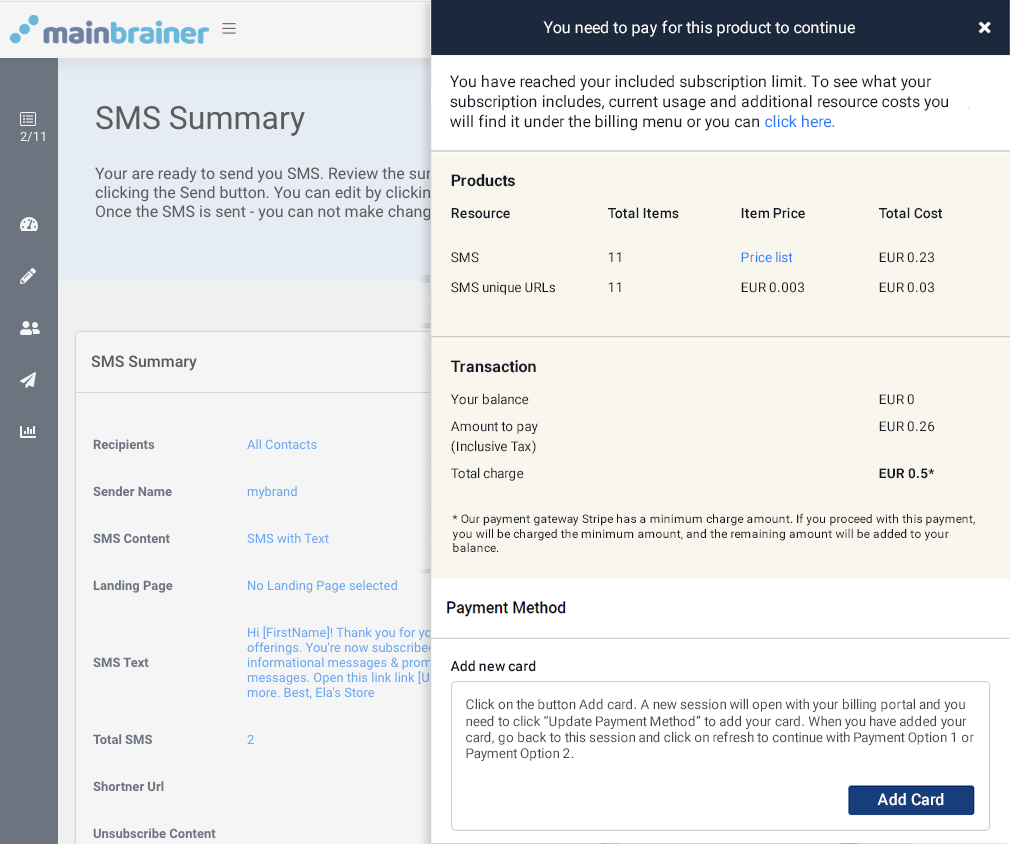
Note: In case you attempt to send more SMSs than are permitted in your subscription plan, and you have insufficient funds in your account to pay for the additional SMSs, the sending will not be executed. In such cases, add the required amount of funds to your MainBrainer account to reattempt the sending.

