When sending SMS campaigns, there are multiple ways to select your campaign recipients. You can send it to complete contact lists, a few segments from a contact list, or everyone in a contact list except those from a segment, etc.
Let’s look at the different recipient selection options available and how they impact your campaign sending:
Option I – Select SMS Recipients from CRM
If you wish to send a campaign to a contact list, use the checkbox displayed against the list name to select the relevant contact list (as highlighted in the screenshot below).
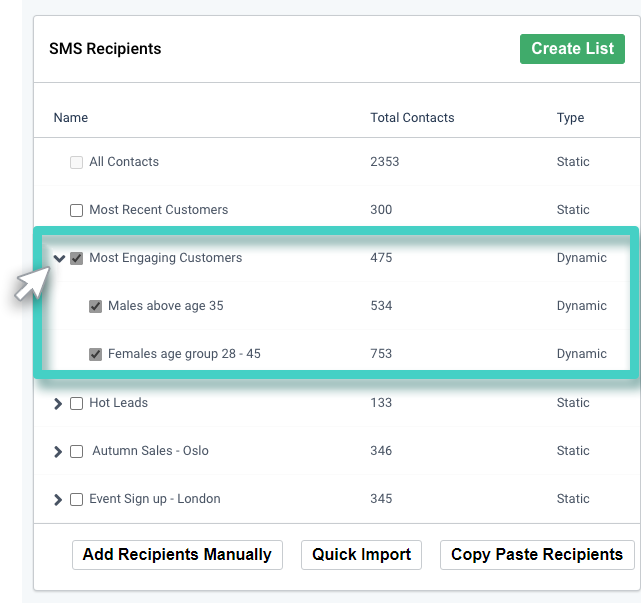
When you select a contact list, all its constituent segments are selected by default.
Note: In case you select a contact list and then manually uncheck its constituent segment, the contacts of the unchecked segment will be excluded from the recipient list. That is, the campaign will not be sent to the contacts that are a part of that segment, even if those contacts are a part of another contact list/segment that is a part of the recipient list.
-
Sending to Some Segments of a Contact List
If you wish to send the campaign to a selected number of segments from a contact list, use the arrow against the list name to expand and view the list segments (as highlighted in the screenshot below).
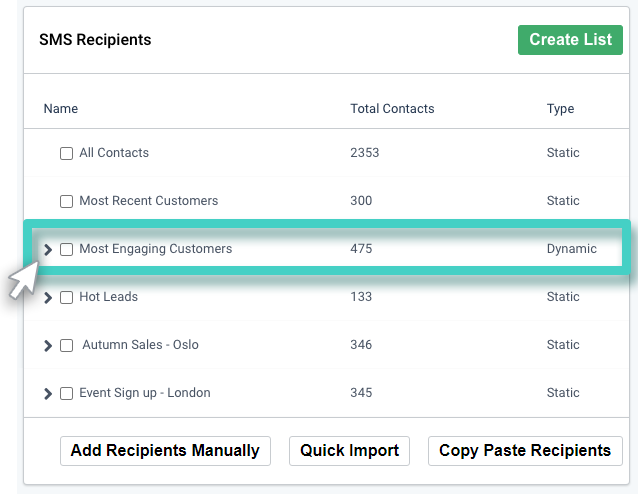
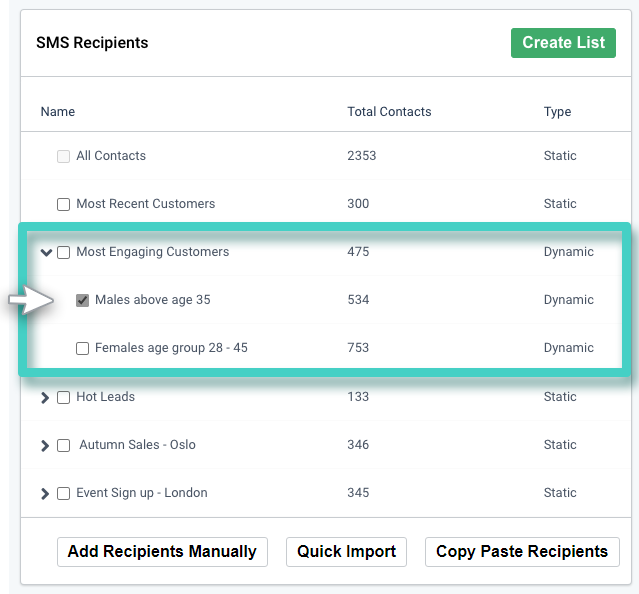
Mark the checkboxes corresponding to the segment names of the segments you wish to send the campaign to.
-
Excluding a Contact Segment from the Sending
If you wish to exclude a segment of contacts from receiving a campaign, select the contact list whose constituent segment you wish to exclude. Hover the mouse over the segment you wish to exclude, an Exclude button will be visible on hover (as highlighted in the screenshot below).
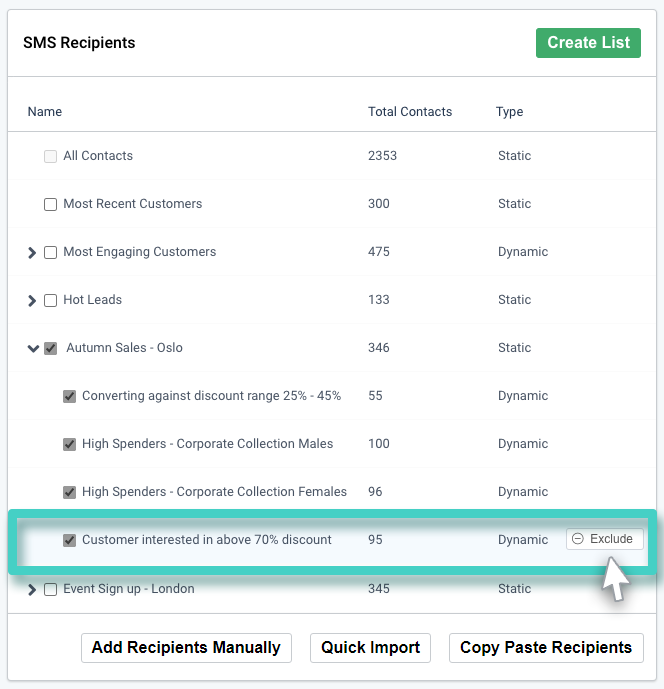
Click the Exclude button to exclude the contacts of the segment from receiving the campaign. The campaign will not be sent to any contact that is a part of the excluded segment, even if the contact is also a part of the other lists/segments that are a part of the recipient list.
Option II – Adding Recipients Manually
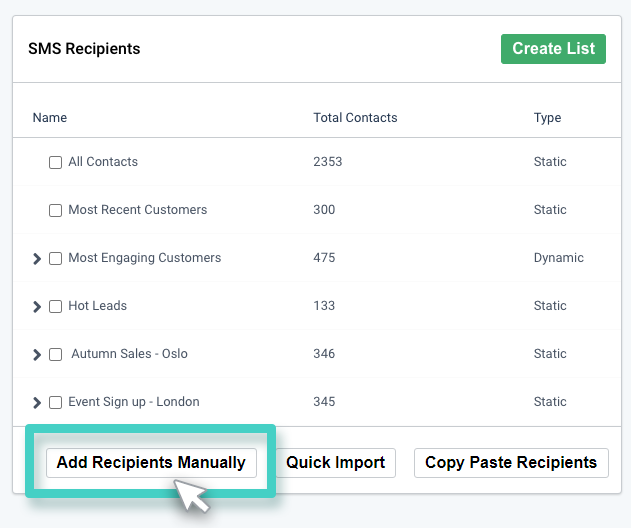
If you wish to type in the recipient details, click the Add Recipients Manually button (as highlighted in the screenshot below).
Use the subsequently displayed section to enter the relevant recipient details. Herein, use the fields:
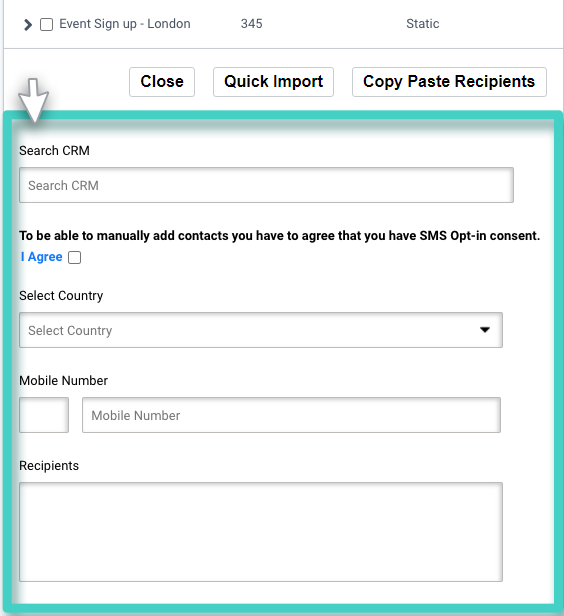
- Search CRM to search the CRM for a contact that already exists in the CRM. You can search for the intended contact by entering either the name or the mobile number in the search field and then select the intended contact from the dropdown.
- I Agree checkbox to confirm that you have explicit SMS opt-in consent from the contacts you are adding manually to the recipient list.
- Select Country to choose the country where the recipient’s mobile number is registered.
- Mobile Number to enter the mobile number of the intended recipient, and click Add.
- Recipients to view the list of manually added recipients.
Note: All the contacts added manually will also be added to the CRM with their opt-in status as opted-in.
Option III – Quick Import Contact
Quick Import allows you to import CSV/XLS files on the platform. Once imported, the platform will automatically list
your contact list underneath.
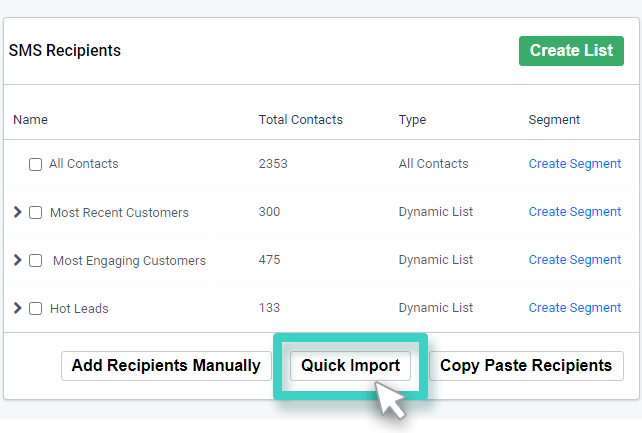
- Click on Quick Import.
- Drag-and-drop your CSV/XLS file in the platform.
- Your List will be visible with the total number of records.
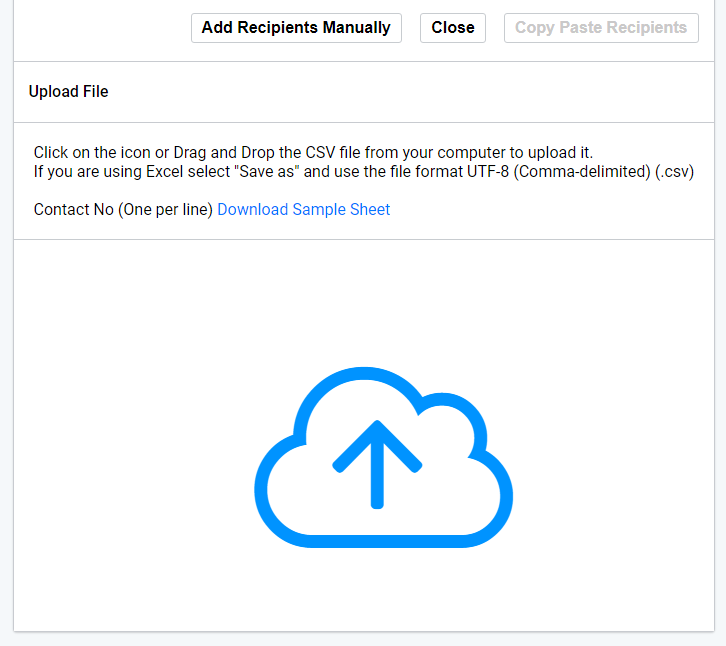
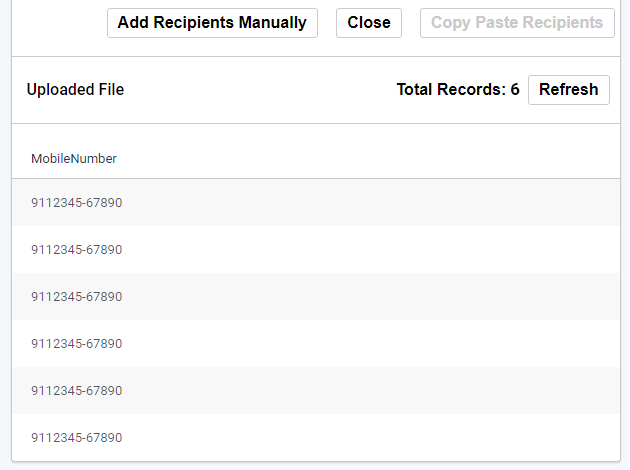
Note: You can Download Sample Sheet to design your file in the same
acceptable format.
Option IV – Copy Paste Recipients
Copy Paste Recipients allows you to copy contacts from the source and then paste them in the text box in the
platform.
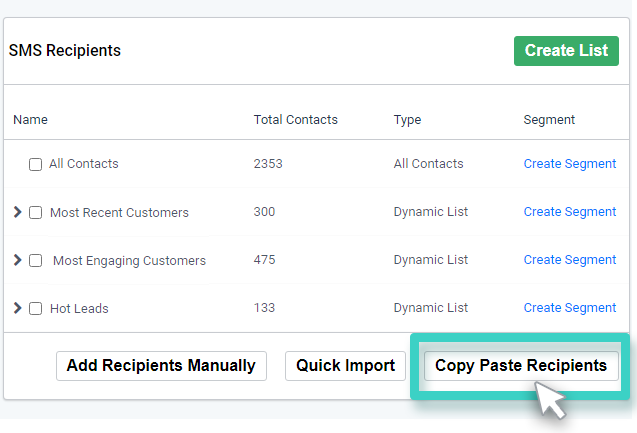
- Click on Copy Paste Recipients under the SMS Recipients.
- Now copy all the contacts from the source and paste them in the text box in the platform.
- Proceed with the rest of the Send SMS process.
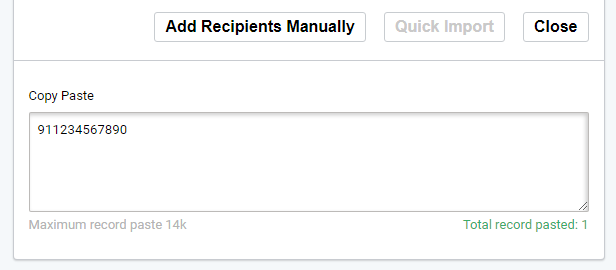
Note: You can copy-paste a maximum of 14k records in the text box.
Note: When sending campaigns, the total recipient count on the SMS sending summary page will display the unique recipient count only. Also, invalid mobile numbers and contacts who have opted out from receiving SMSs from you will be excluded from the total recipient count.
