Step 1 – Navigate to the Template Creation Screen
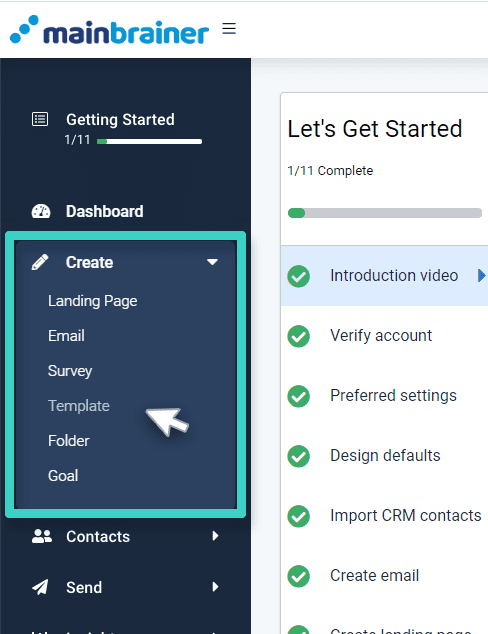
Use the Main Menu on the left to expand the Create menu and click Template.
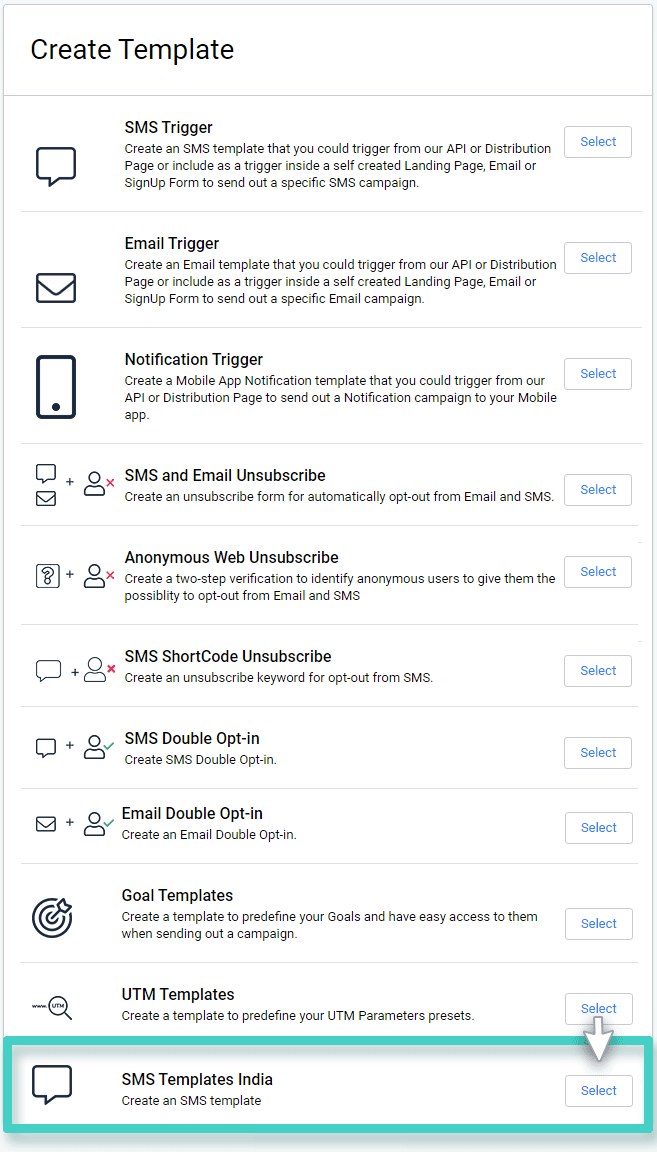
The subsequent screen lists the different templates that can be created in MainBrainer. Select the SMS Templates India option (as highlighted in the screenshot below).
Step 2: Create a new SMS Sender
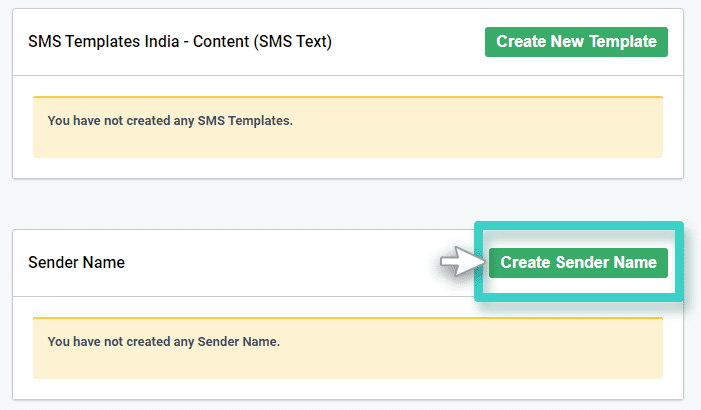
Click the Create Sender Name button (as highlighted in the screenshot below).
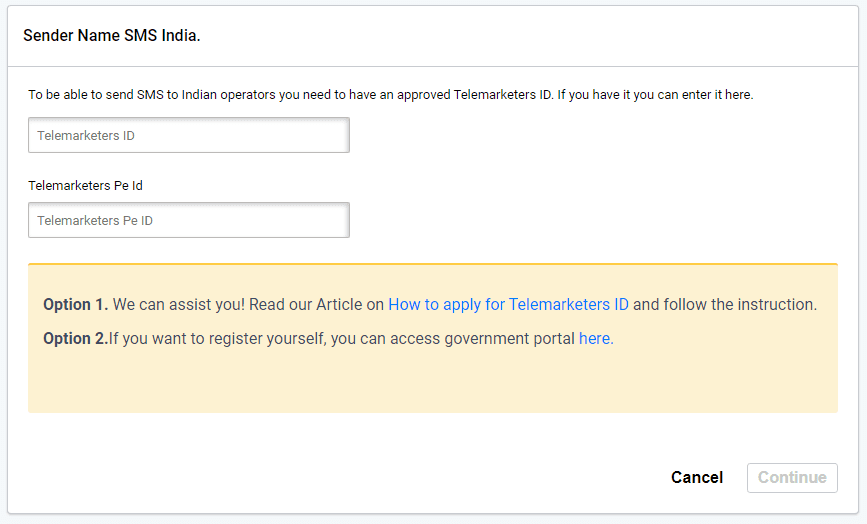
The subsequent screen will ask you to fill the following details (see screenshot below):
- Enter Telemarketer ID
- Enter Telemarketer PE ID (Account ID)
Note: You need to get both these IDs from the government portal before proceeding. In case you don’t, here is a comprehensive guide to help you get your Telemarketer ID and apply for a Telemarketers PE ID (Account ID).
Once you’ve entered the details, click on Continue.
Note: This screen is only displayed once. Once you enter your Telemarketer ID and Telemarketers PE ID (Account ID), this step will no longer be visible.
Step 3: Enter Your Approved SMS Header Values
On the subsequent screen:
- Use the Message Type drop down menu to select the menu-option Text.
- Use the field Sender ID to enter the SMS Header ID as approved by TRAI.
- Use the field Sender Name to enter the SMS Sender Name as approved by TRAI.
Note: Enter all these values as have been approved by TRAI. Your SMSs will get delivered only if the entered information matches exactly with the information registered on the TRAI-DLT platform.
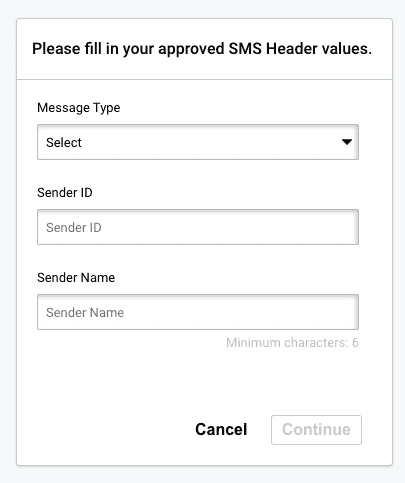
Click Continue when done.
The entered Sender Name will now be available for use on the SMS sending screen.
