Step 1
Navigate to the CRM
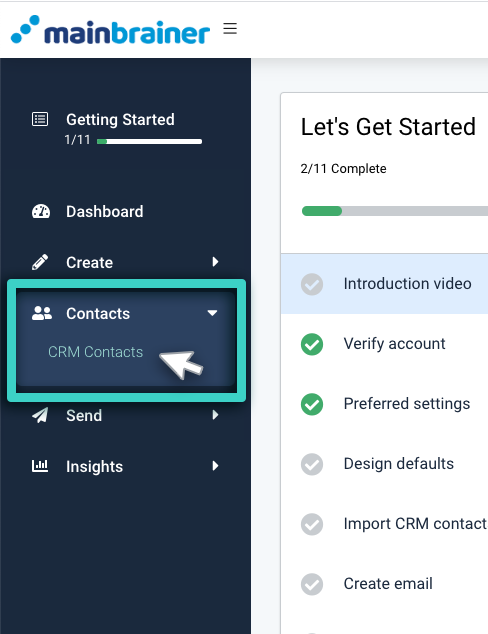
Use the Main Menu on the left to expand the Contacts menu and click CRM Contacts.
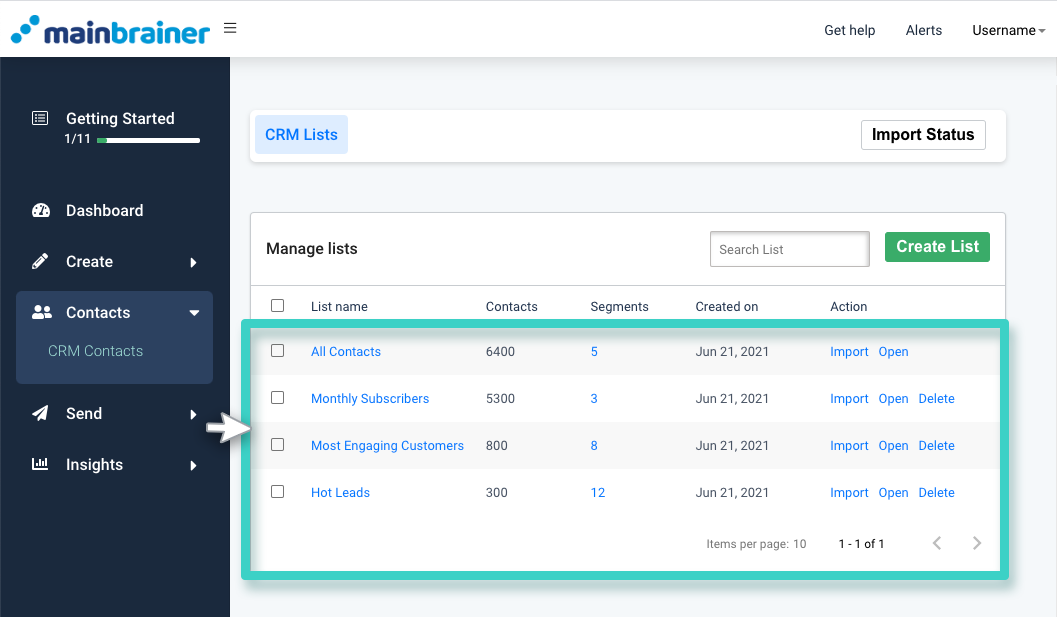
The subsequent page displays all the contacts lists created to date in your MainBrainer account.
Step 2
Identify the CRM list to which you wish to add the new contact
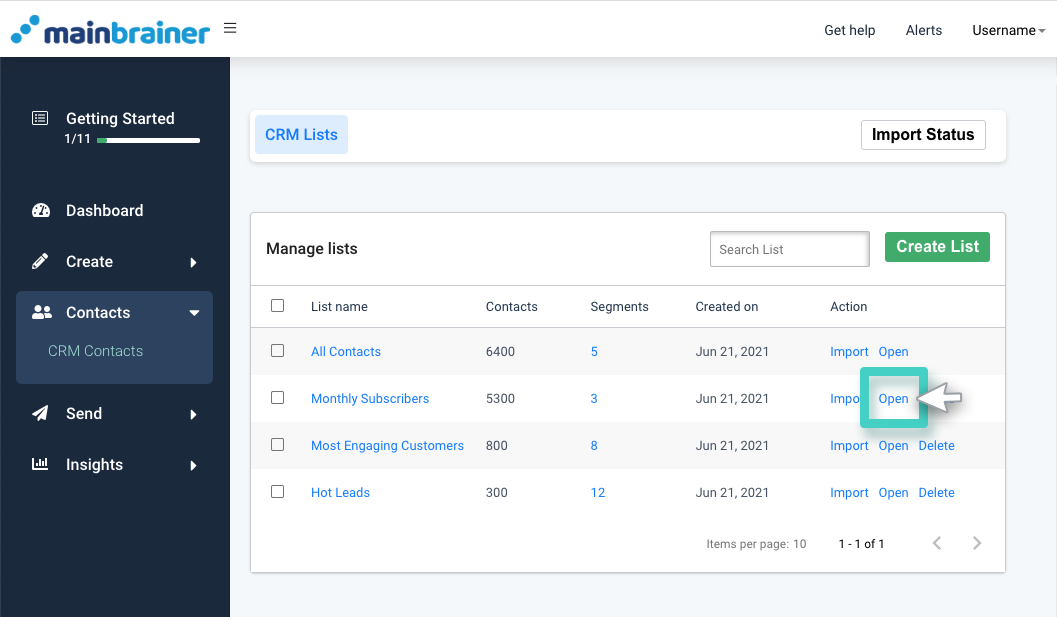
Navigate to the contact list to which you wish to add the new contact. Against that listing, click the Open button to view the list data (as highlighted in the screenshot below)
Step 3
Create a contact
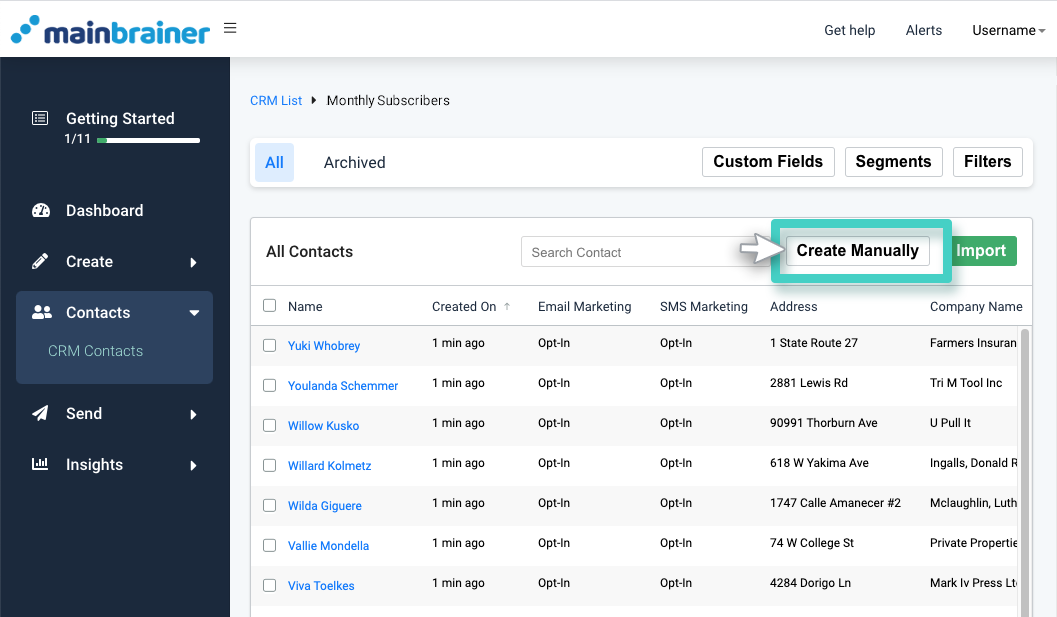
Click the Create Manually button (as highlighted in the screenshot below) to manually add a contact to your contact list.
Step 4
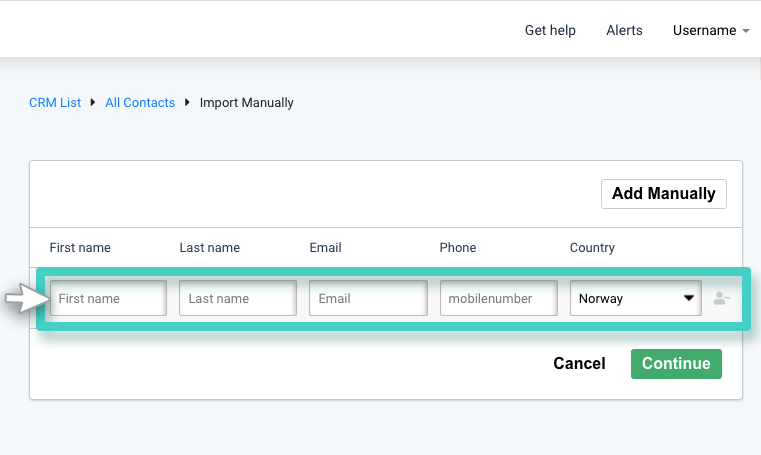
Type in the basic contact data
Use the fields highlighted in the screenshot below to type in the basic contact details – the contact name, Email address, country, and mobile number.
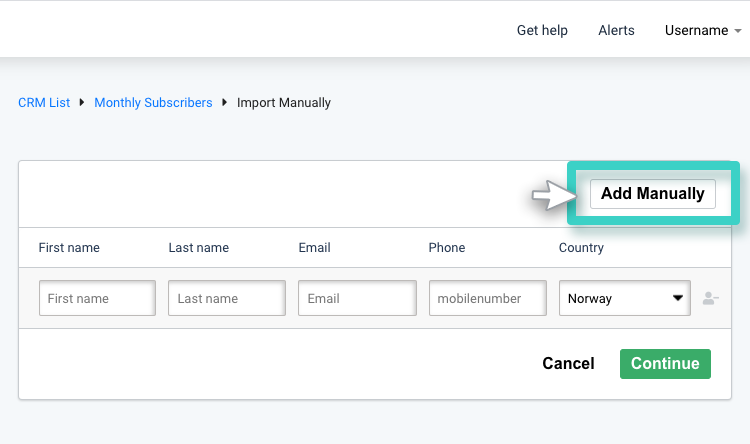
To add more than one contact entry, click the Add Manually button (as highlighted in the screenshot below) and start entering the required details.
Click the Continue button when done. As you do, this contact will be added to the CRM under the specified list. It will also be visible under All Contacts.
Note: If you click Continue without typing in any contact details, we create a new contact in the CRM with your account’s default country name alone.
Step 5
Add detailed contact information, if any
As you click the Continue button in the previous step, you will be redirected to the contact list to which the contact was added. Here, the newly added contact will appear at the top of the list.
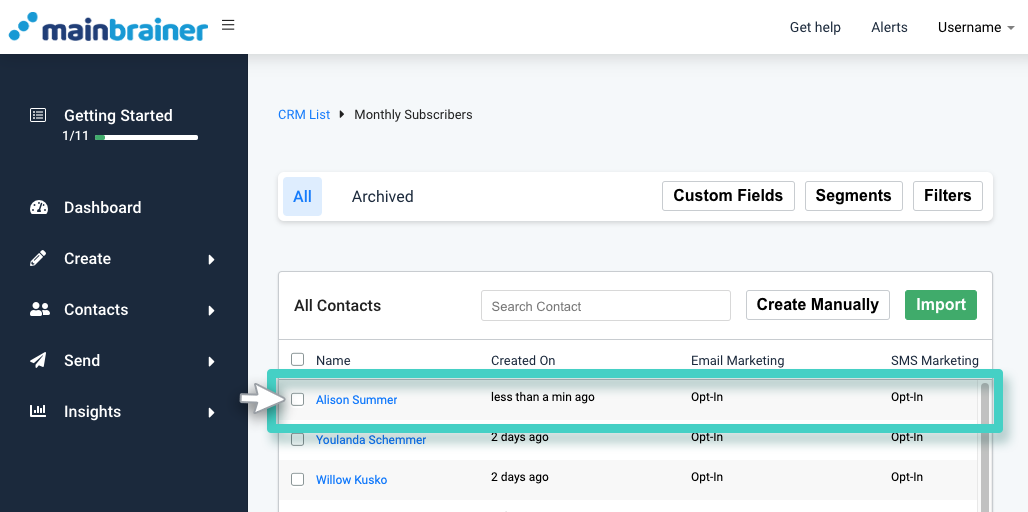
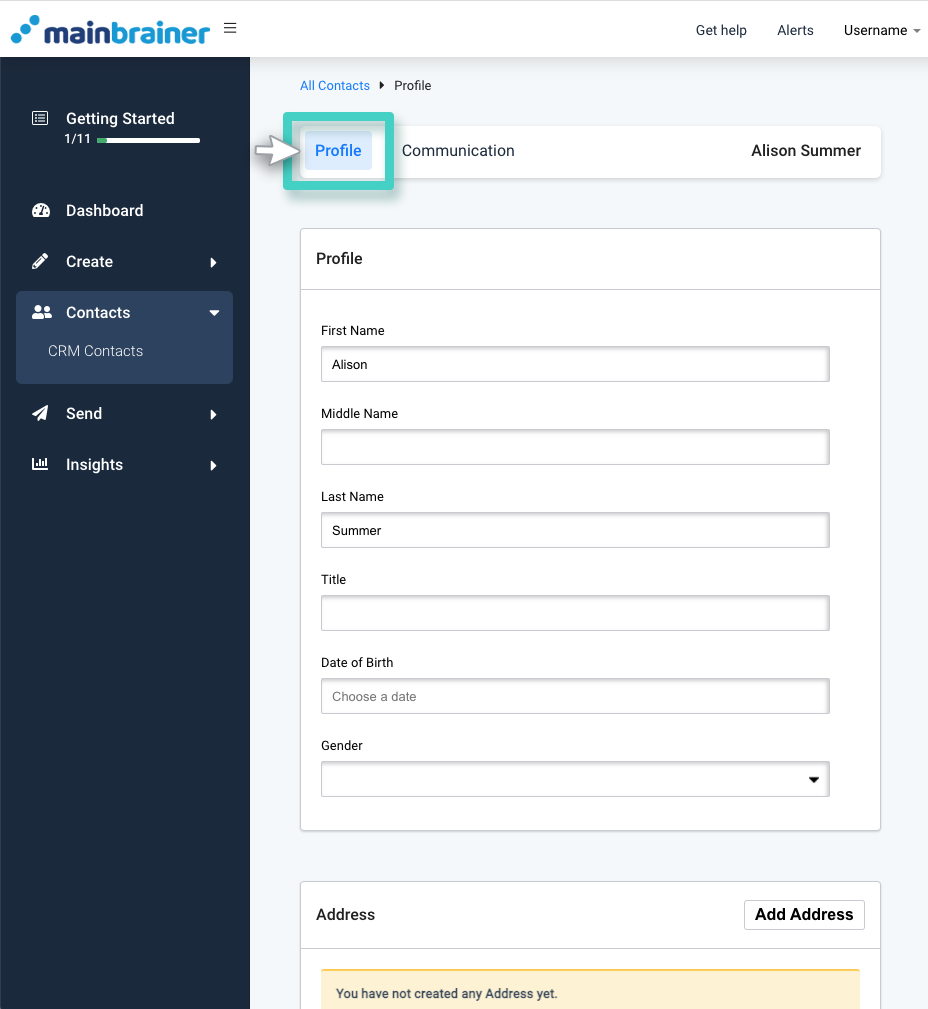
If you wish to add further data for this contact, click on the contact name. The subsequent page will display the detailed contact profile. Enter any information that you wish to add in the relevant section on this profile page, and click the Save button.
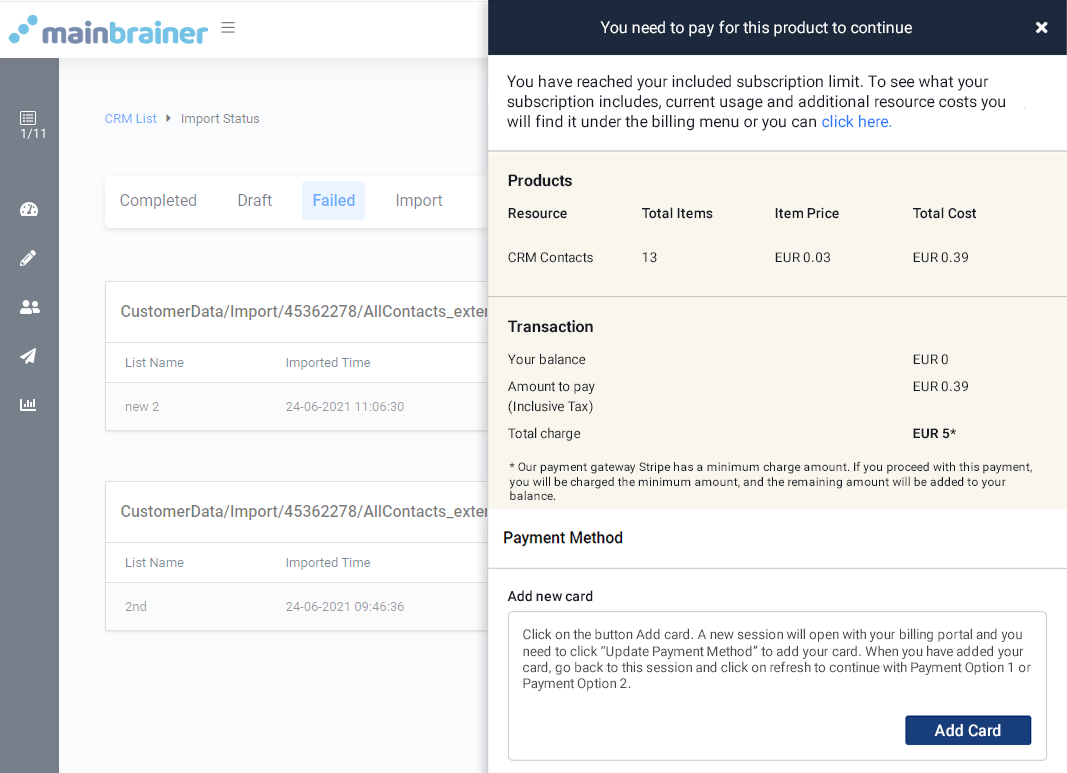
Note: In case you have exhausted your quota of contacts permitted in your subscription plan, and you have insufficient funds in your account to pay for an additional contact, you will be prompted to add funds to your account when you attempt to add a new contact manually.
Use the sidebar as shown in the screenshot below to add the necessary funds to your account balance.
