Step 1 – Navigate to Your Account’s Configuration Settings
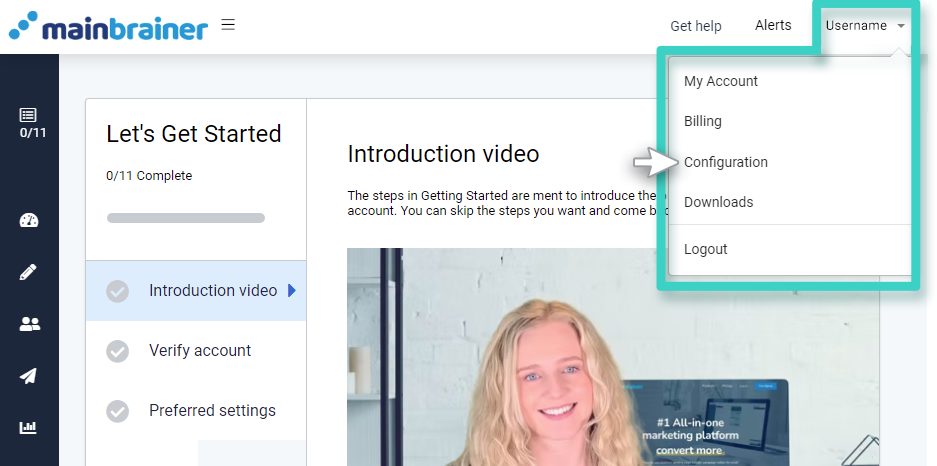
As you log into your account, the top-right corner of the screen displays your account name, i.e. the name under which you have registered your MainBrainer account.
Click the account name to expand the account settings menu and click Configuration (as highlighted in the screenshot below).
Step 2 – Open the Domains Tab
Click the Domains tab to view your domain configurations.
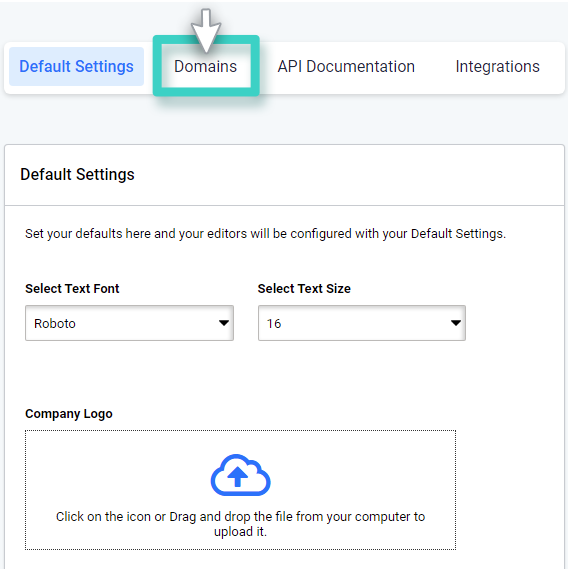
Click Add Domain to configure a new domain for hosting your landing page URLs.

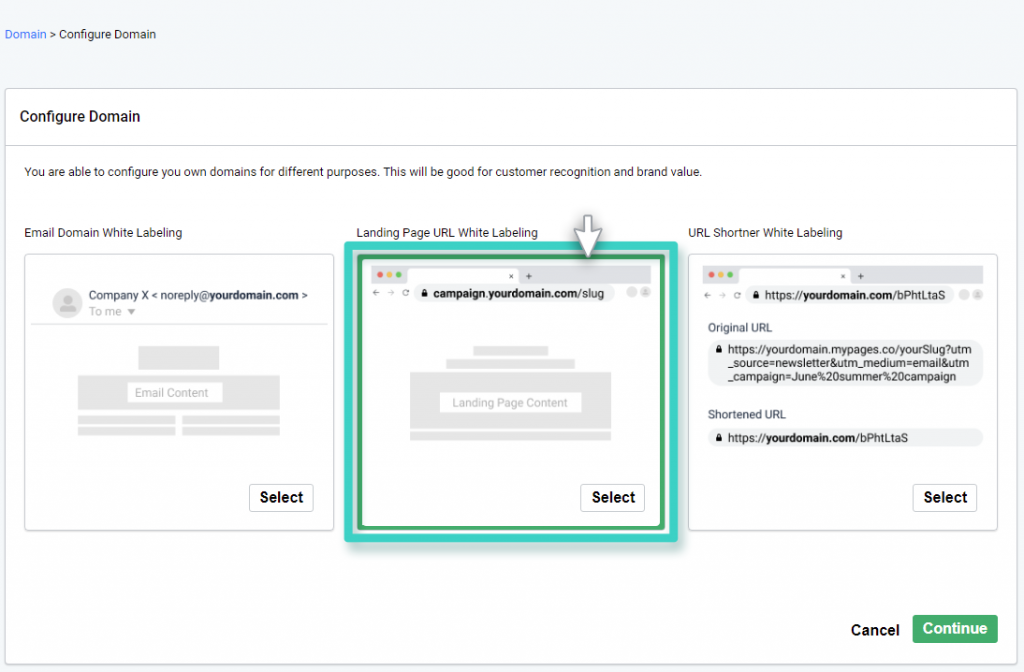
Step 3 – Configure Your Domain to Whitelabel Your Landing Page URLs
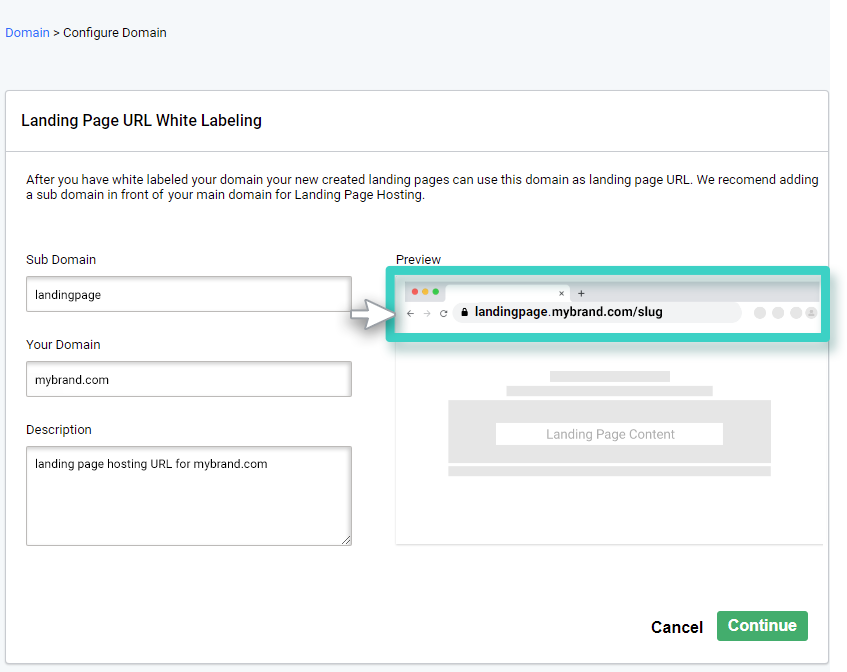
Select the box below the heading Landing Page URL White Labeling and click Continue.
On the subsequent screen, you’ll need to enter the domain name and the subdomain that you wish to use for hosting your landing pages. Herein:
- Use the field Sub Domain to enter the subdomain you wish to use for hosting.
For example, if you wish to use the URL landingpage.smsblasting.in to host your landing pages, use this field to enter the subdomain landingpage.
Note: Using a subdomain to host your landing pages is optional, but highly recommended. Subdomains help you manage different parts of your site separately, without touching your root domain. This ensures that the subdomain can be managed without impacting the other subdomains or the root domain.
- Use the field Your domain to enter your root domain.
For example, if you wish to use the URL landingpage.smsblasting.in to host your landing pages, use this field to enter the root domain smsblasting.in.
Note: Ensure that you don’t include www. or http://www. in this field.
- Use the field Description to add a reference description for your domain configuration. This description is purely for your reference purposes. Once your domain is configured, this description will be displayed against your domain configuration on the screen shown in Step2.
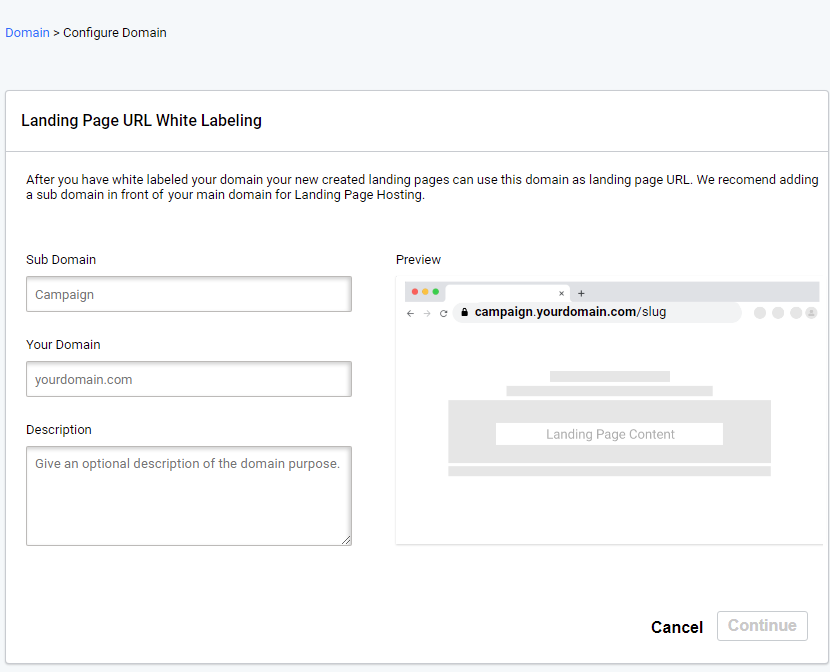
As you type in your root domain and the sub domain, the preview area on the right side helps you visualize how the URL will reflect in your customers’ address bars when they open your landing pages.
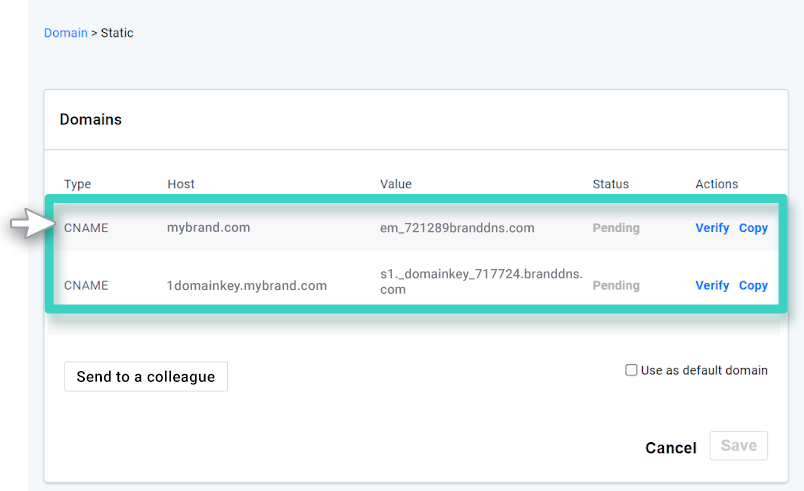
Step 4 – Add CNAME Records to Your Web Host
The next screen will display the two CNAME records that you need to punch into your web host (i.e., the service that hosts your domain name, e.g., GoDaddy, Rackspace, etc.):
- The Domain level CNAME records
- The SSL certificate CNAME records
Note: While the Domain level CNAME records are generated automatically, the SSL certificate records might take some time to get generated and displayed (upto ten minutes).
If the screen displays both the records (as shown in the screenshot below), copy the records using the Copy button under the Actions header to avoid any errors, and add them to your web host. If you are not technically equipped to do so, you can use the Send to a Colleague button to email the records to a co-worker or the relevant person in your company’s IT team.
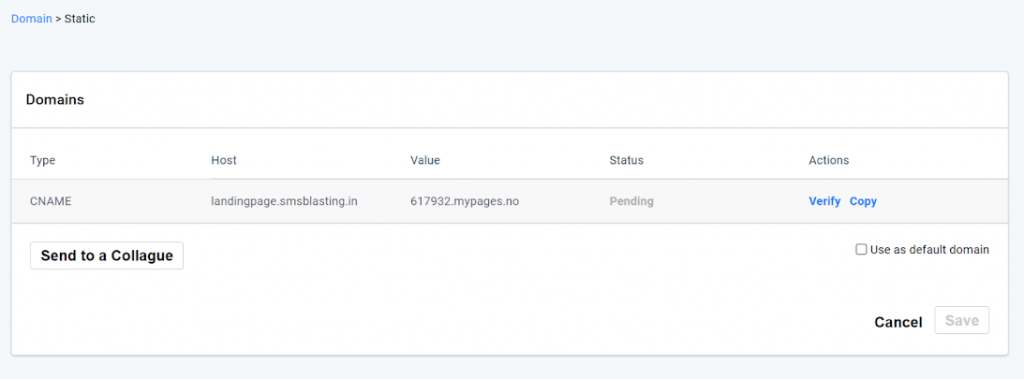
But, in case the screen displays only the Domain level CNAME records (as shown in the screenshot below), copy the records using the Copy button under the Actions header, and add them to your web host. Once you do, come back to this screen and click the Verify button for the added record. As you click Verify, the page will refresh to display the SSL certificate CNAME records. Once the records are displayed, copy them and them to your web host as well.
Note: Prior to white labeling your landing page URLs, if you have whitelabeled your URL shortener using the same domain name, the SSL CNAME records will be displayed as verified. You’ll only need to copy and verify the Domain level CNAME records in that case. Also note that in that case, there will be no additional charges for using the same domain for whitelabeling your landing page URLs.
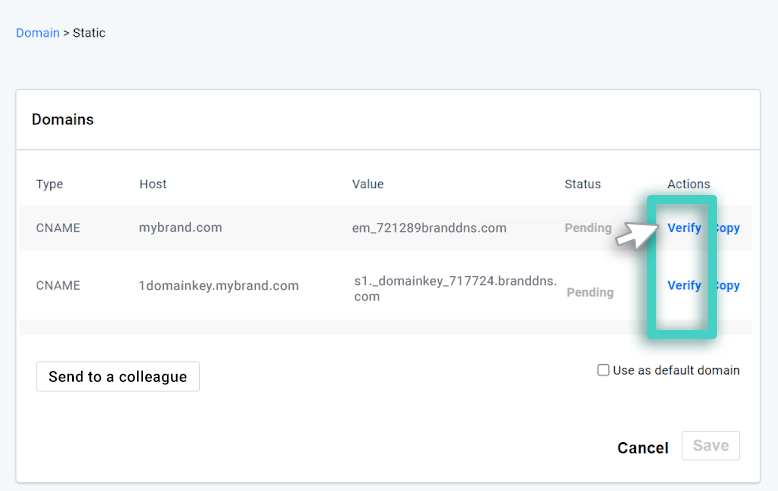
Step 5 – Verify Your DNS
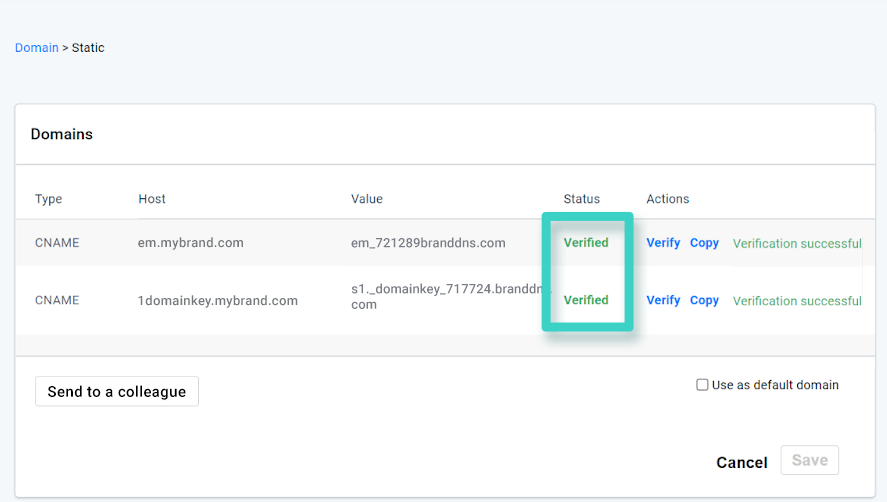
Once you have added the DNS records, return to the Domains tab (as demonstrated in the steps 1 and 2) and click Verify as highlighted in the screenshot below.
Once you do, the Status will get changed to Verified (as highlighted in the screenshot below).
And that’s it! You have successfully configured your domain with your MainBrainer account and can begin hosting your landing pages on the configured domain.
How to Use the Configured Domain to Host Your Landing Page
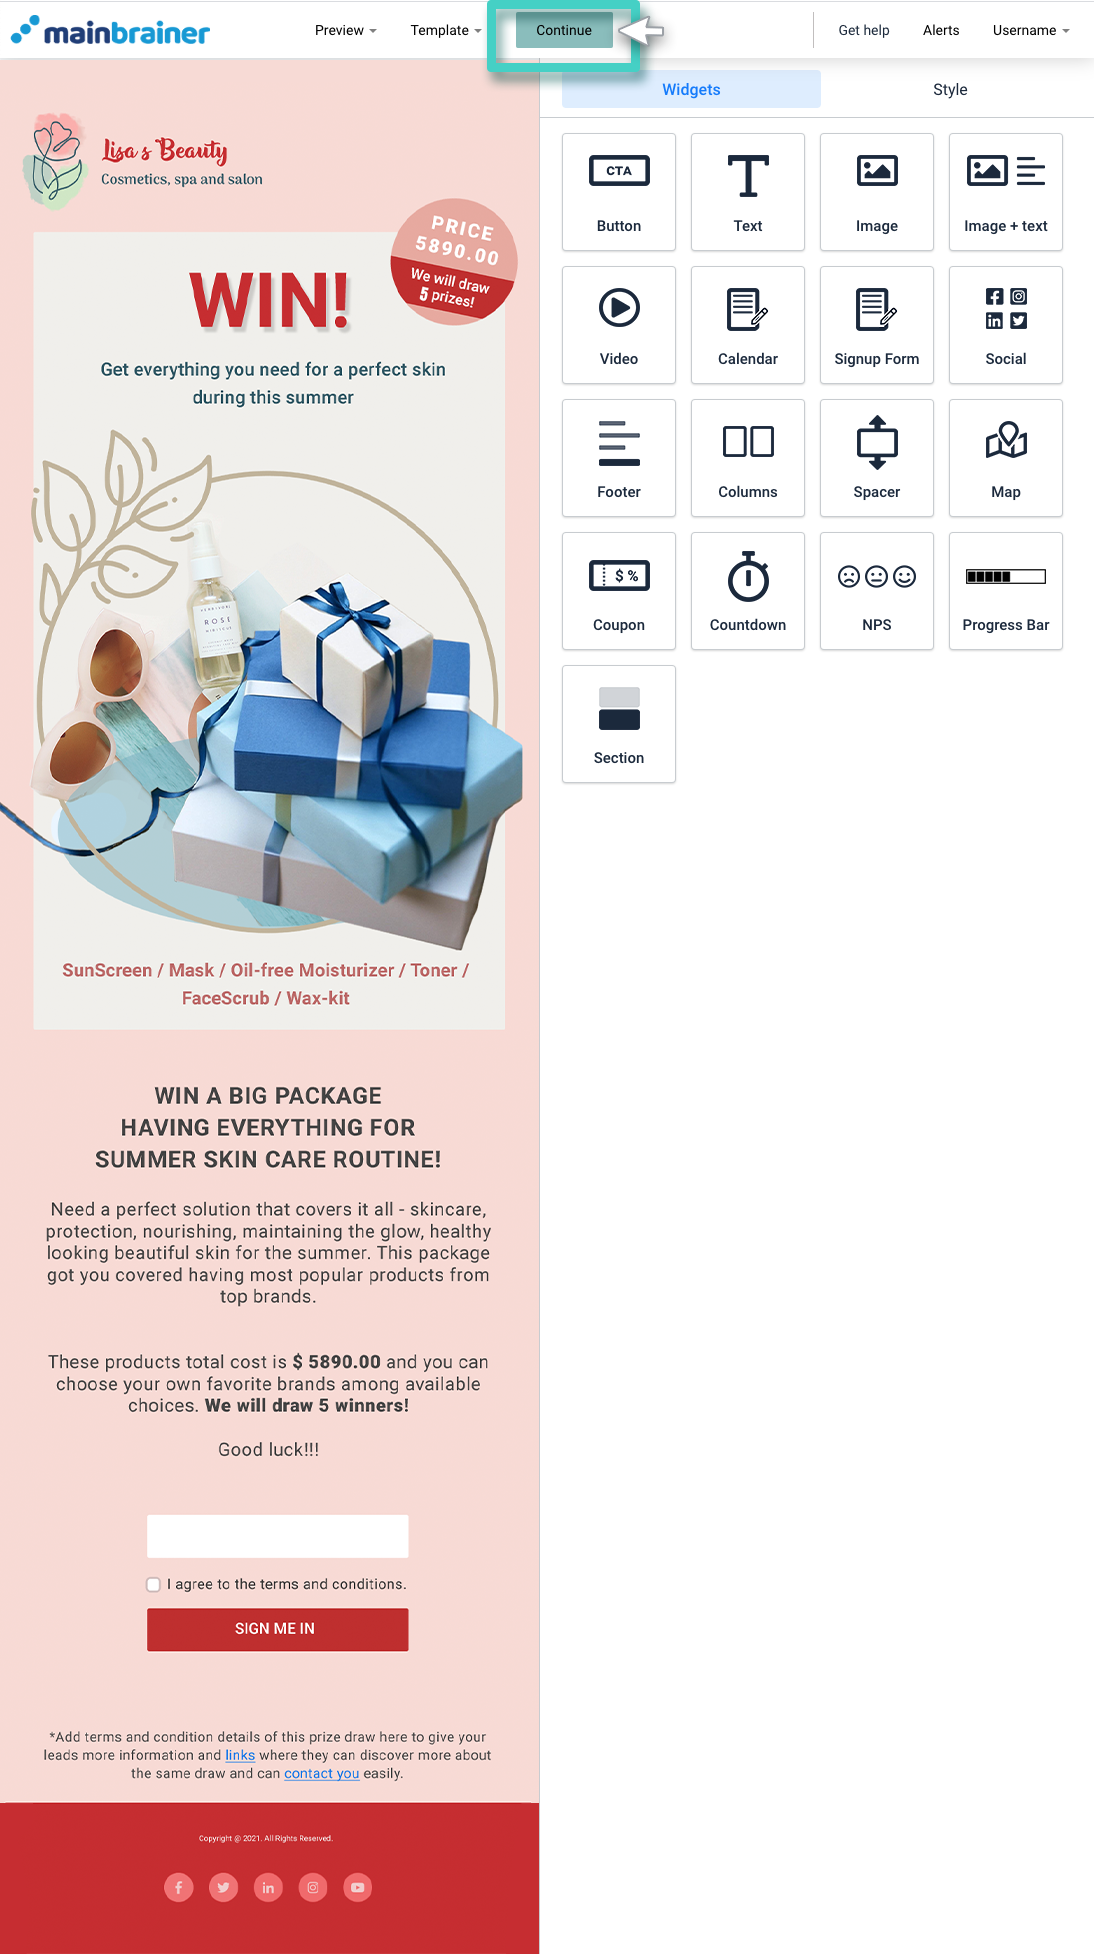
When you create your landing page, and click Continue as highlighted in the screenshot below, the next screen will prompt you to create a slug for your landing page URL.
Use the drop down menu highlighted in the screenshot below to select your domain. Then, proceed to the next field Slug to customize your URL slug. Whatever you input in this field will get appended to the selected domain as displayed in the next field Preview of URL. The URL displayed under Preview of URL is the URL that will be used to host your landing page, i.e., the URL visible to your customers in their browser’s address bar when they open your landing page.
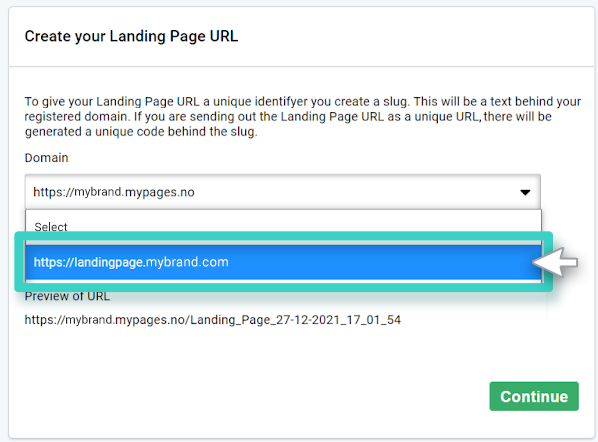
Note: If you choose to distribute your landing page with Unique URLs, there will be an additional unique code appended at the end of this URL.