Step 1 – Navigate to Your Account’s Configuration Settings
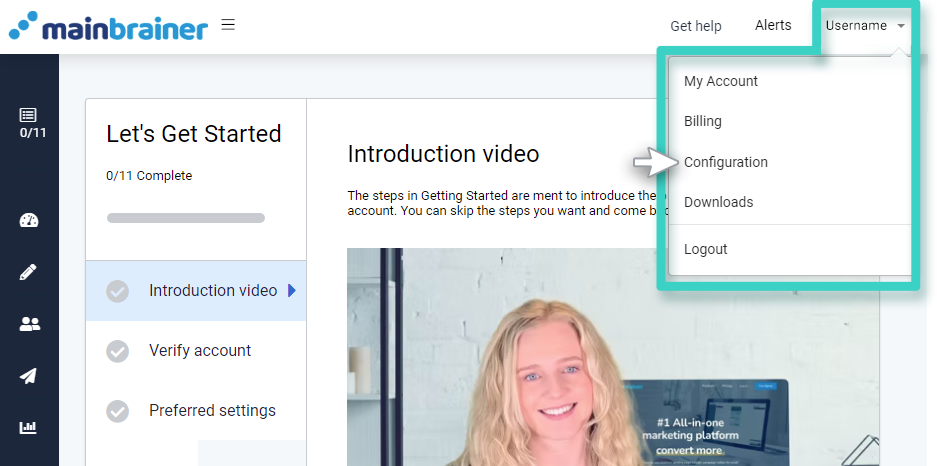
As you log into your account, the top-right corner of the screen displays your account name, i.e. the name under which you have registered your MainBrainer account.
Click the account name to expand the account settings menu and click Configuration (as highlighted in the screenshot below).
Step 2 – Open the Domains Tab
Click the Domains tab to view your domain configurations.
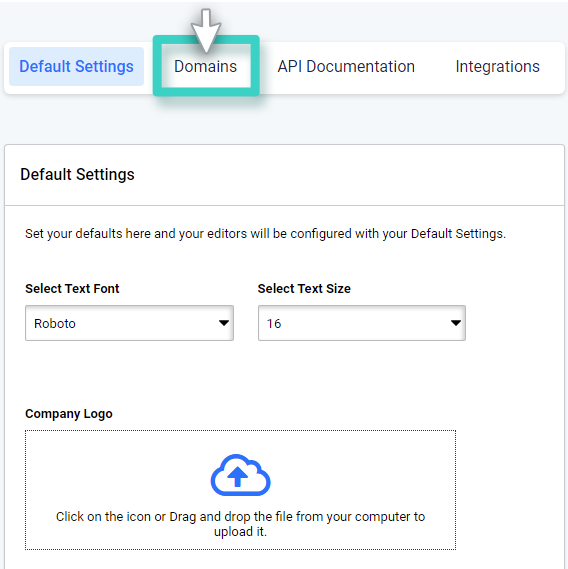
Click Add Domain to configure a new domain for white labeling your email sending.

Step 3 – Configure Your Domain to Whitelabel Your Email Sendings
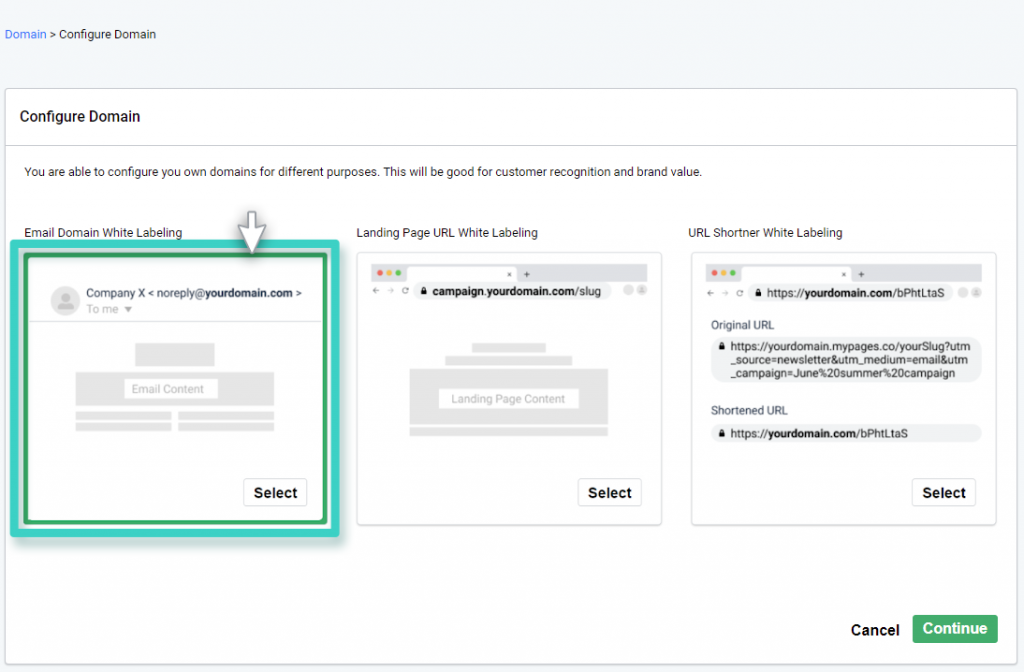
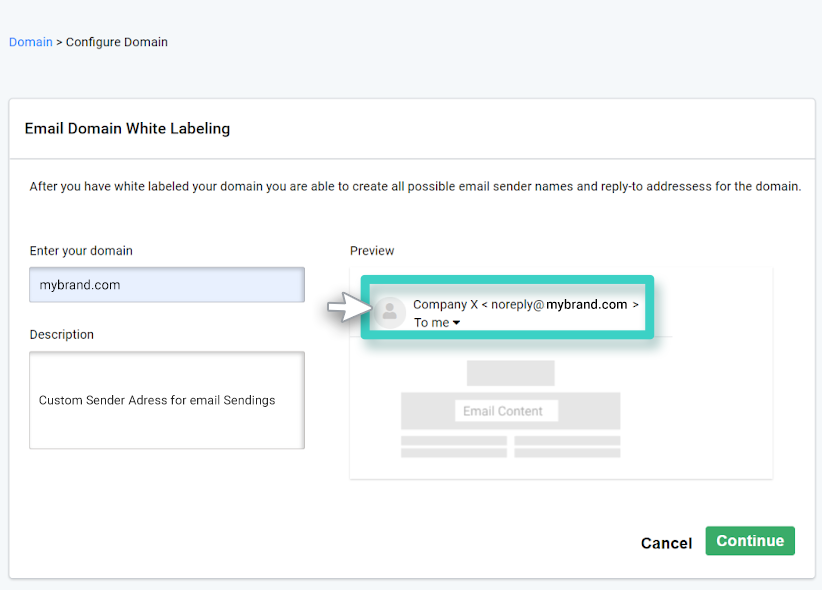
Select the box below the heading Email Domain White Labeling and click Continue.
On the subsequent screen, you’ll need to enter the domain name that you wish to use for sending your email campaigns. Herein:
- Use the field Enter Your domain to enter the root domain you wish to use for sending your email campaigns.
For example, if you wish to use the email address noreply@smsblasting.in to send your email campaigns, use this field to enter the root domain smsblasting.in.
Note: Ensure that you don’t include www. or http://www. in this field.
- Use the field Description to add a reference description for your domain configuration. This description is purely for your reference purposes. Once your domain is configured, this description will be displayed against your domain configuration on the screen shown in Step2.
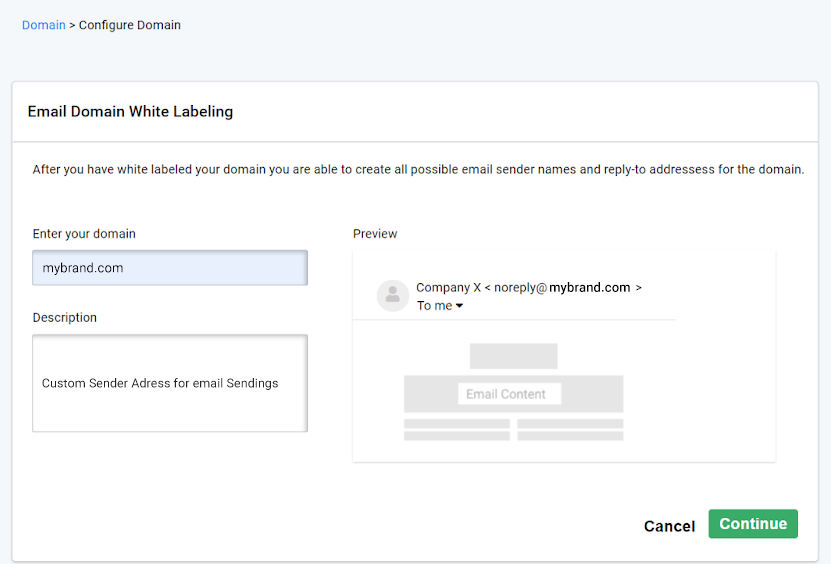
As you type in your root domain, the preview area on the right side (as highlighted in the screenshot below) helps you visualize how an Email address configured with your domain will appear in your customers’ mailboxes.
Step 4 – Add CNAME Records to Your Web Host
The next screen will display the CNAME records that you need to punch into your web host (i.e., the service that hosts your domain name, e.g., GoDaddy, Rackspace, etc.)
Copy the records using the Copy button under the Actions header to avoid any errors, and add them to your web host. If you are not technically equipped to do so, you can use the Send to a Colleague button to email the records to a co-worker or the relevant person in your company’s IT team.
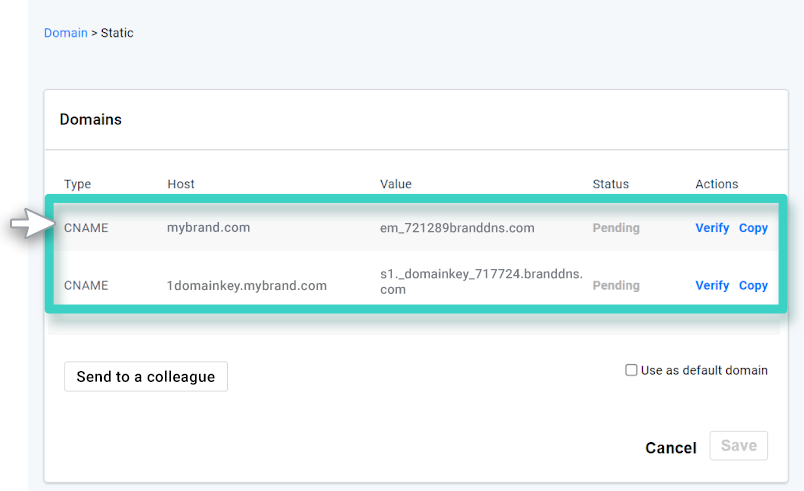
Select the Use as default domain checkbox if you wish to make this domain the default domain for sending email campaigns.
Note: For each account, you can only configure one domain for white labeling your emails. You can, however, configure multiple email addresses with the configured domain.
For example, if you whitelabel your domain smsblasting.in, you can configure and use multiple email addresses as the sending email with this domain like noreply@smsblasting.in, help@smsblasting.in, care@smsblasting.in, etc.
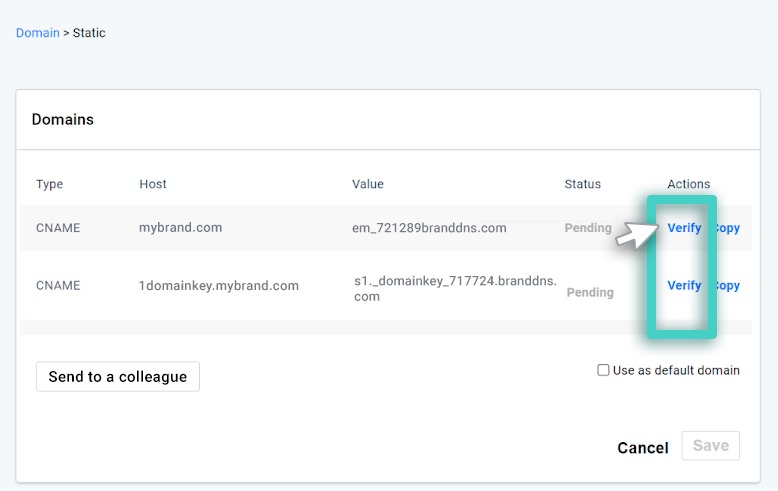
Step 5 – Verify Your DNS
Once you have added the DNS records, return to the Domains tab (as demonstrated in the steps 1 and 2) and click Verify as highlighted in the screenshot below.
Once you do, the Status will get changed to Verified (as highlighted in the screenshot below).
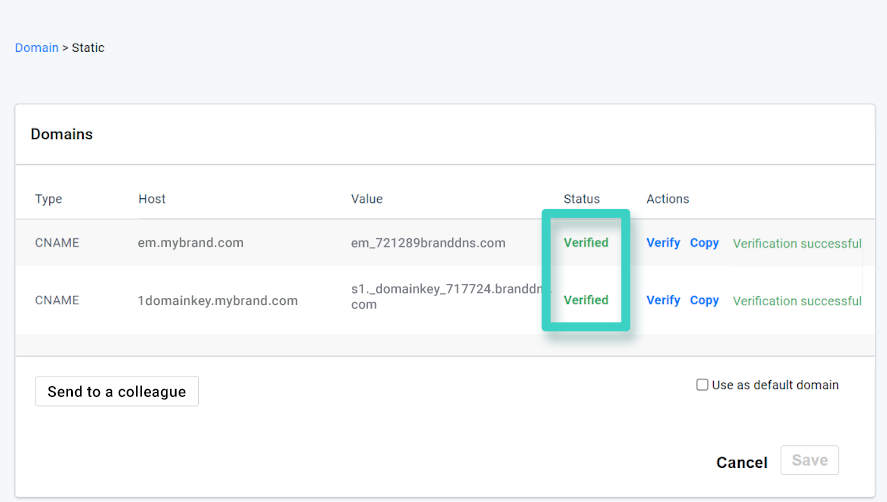
And that’s it! You have successfully configured your domain with your MainBrainer account and can now create a custom sender Email address with the configured domain for your Email campaigns.
How To Create A Custom Sender Email Address
When you send your Email campaigns, use the Sender Email dropdown menu to select the option Create Sender Email.
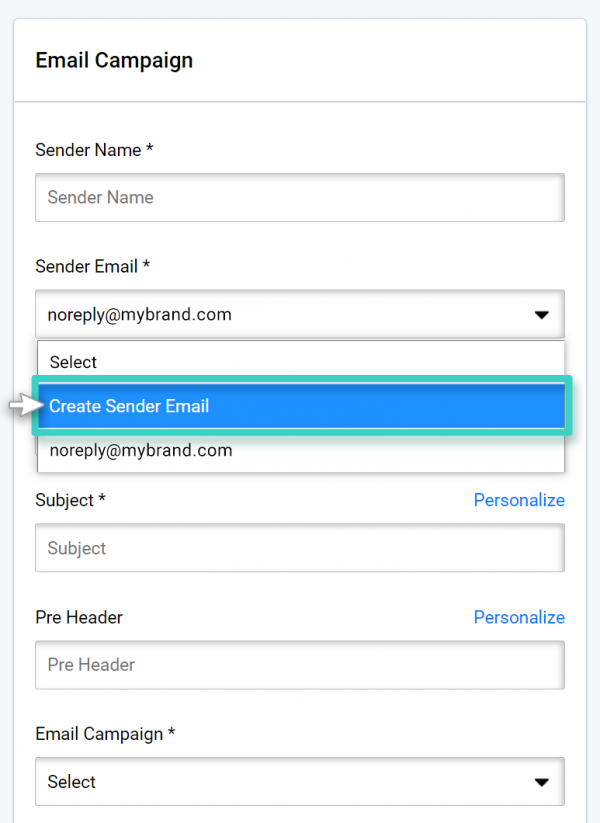
In the subsequently displayed sidebar, enter the email address you wish to use as the Sender Email for your campaigns.
blue –
Note: You must have access to the email address you enter here, as you’ll need to verify the address before you can use it as your sender address.
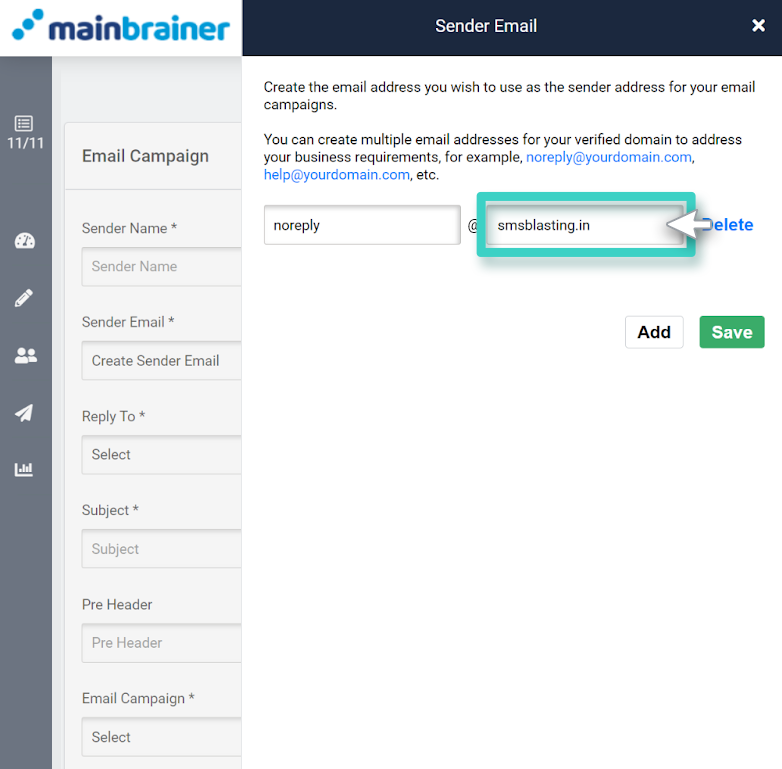
Herein, use the text box highlighted in the screenshot below to type in the local part of the email address you wish to use as your sender email address.
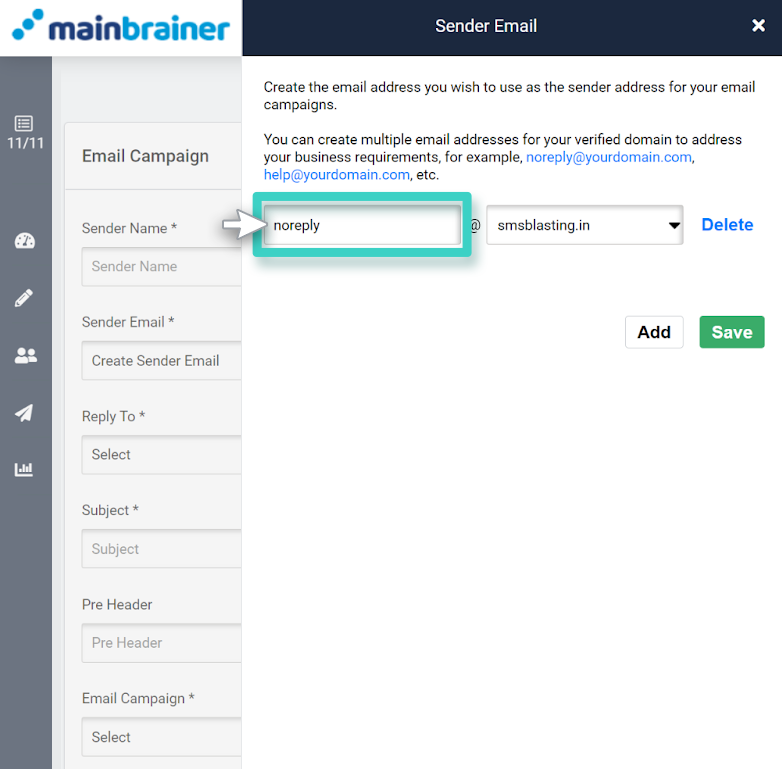
Then, use the dropdown menu highlighted in the screenshot below to select the configured domain you wish to use as your sender email and click Save.
As you click Save, a verification email will be sent to the entered email address. Click on the verification link in the email to verify your email address. Once verified, the email will be available for use as a Sender Email.
Until manually deleted, this email address will remain available for use as a sender email for all your subsequent email campaigns.
Note: You can only configure one domain for email whitelabeling per account. You can, however, create as many sender emails as you wish for the configured domain.